Employer Portal Employee Population
The employee directory can be populated by either the Portal Sponsor importing/interfacing with the employer and syncing the population, manually adding employees or the employer may also manually import a list of employees by importing a CSV file directly from their HR software vendor.
Manually Add
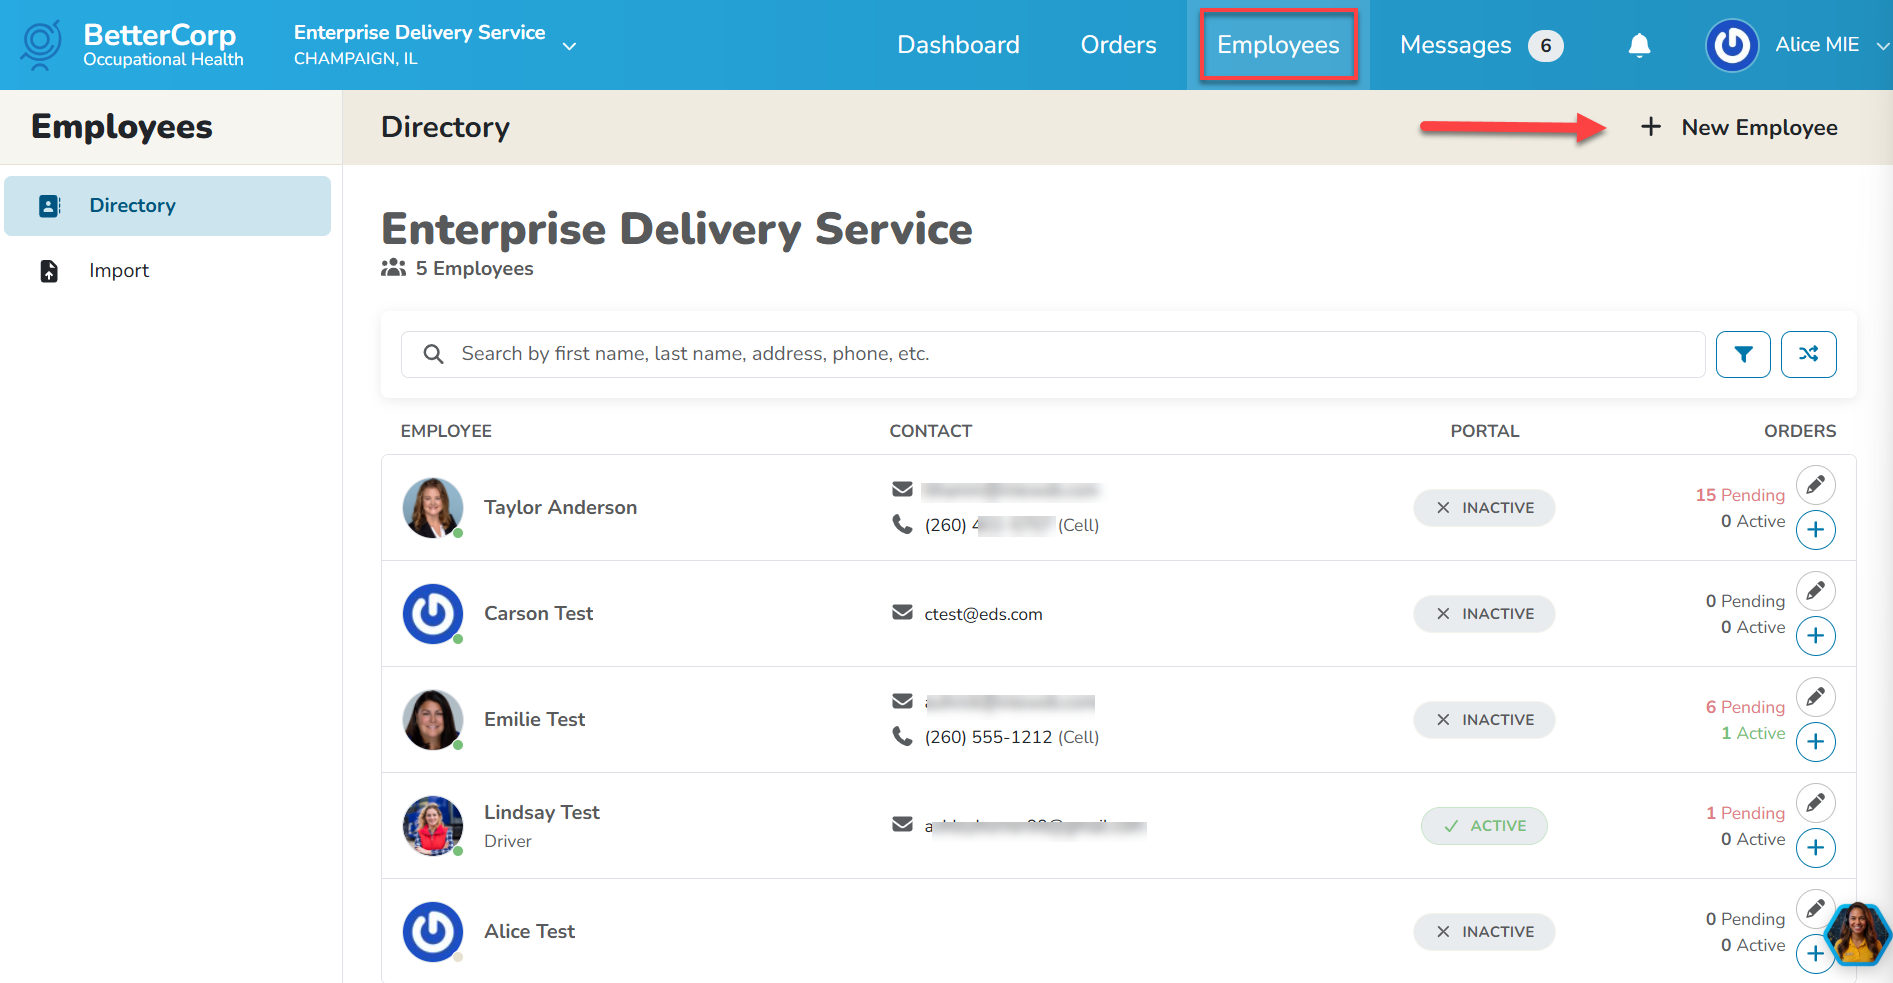
Navigate to the Employee tab, and then select the +New Employee option to add a new employee.
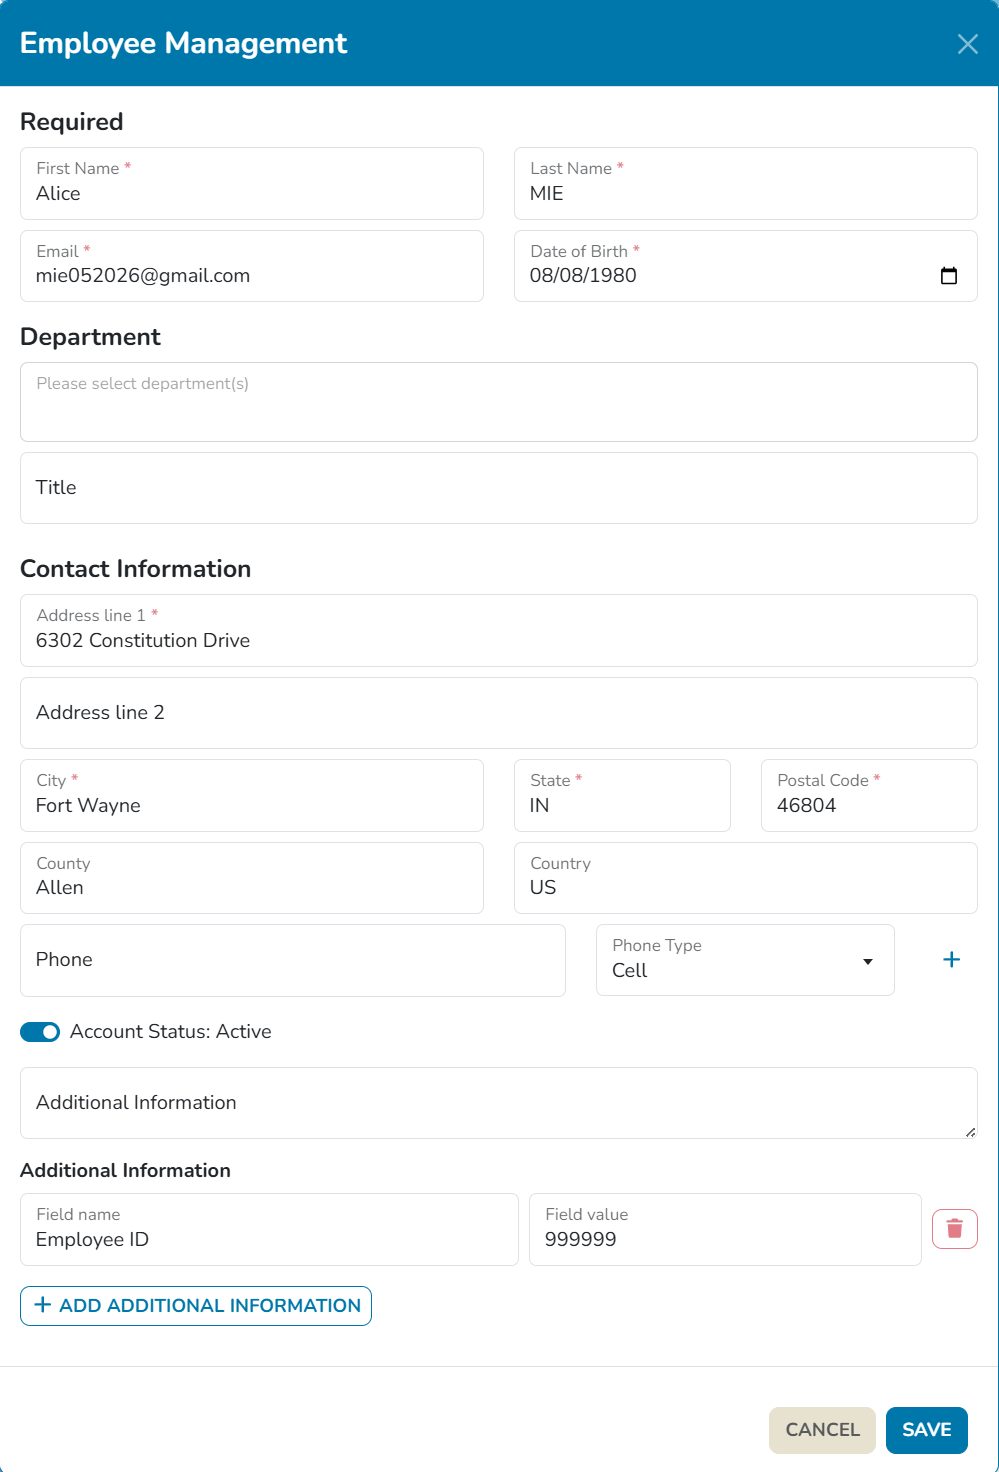
Enter the employee/patient demographic information. Required fields are indicated with a red asterisk. This information is required to help locate a clinic near the employee/patient and/or prevent duplicate accounts. Click Save when completed.
Please note: If Additional Fields display, they have been configured by the Sponsor and may vary by employer.
Manually Search
Search for an employee by using the Search box, then click on the employee name. Clicking on the employee name will display a pop up box with a summary of the employee’s demographics. Those with proper security may view and/or edit demographic information. Click the Edit pencil icon to edit the employee demographics. Click the PLUS icon to quickly add an order. Clicking on the employee name will display recent orders list for the employee.
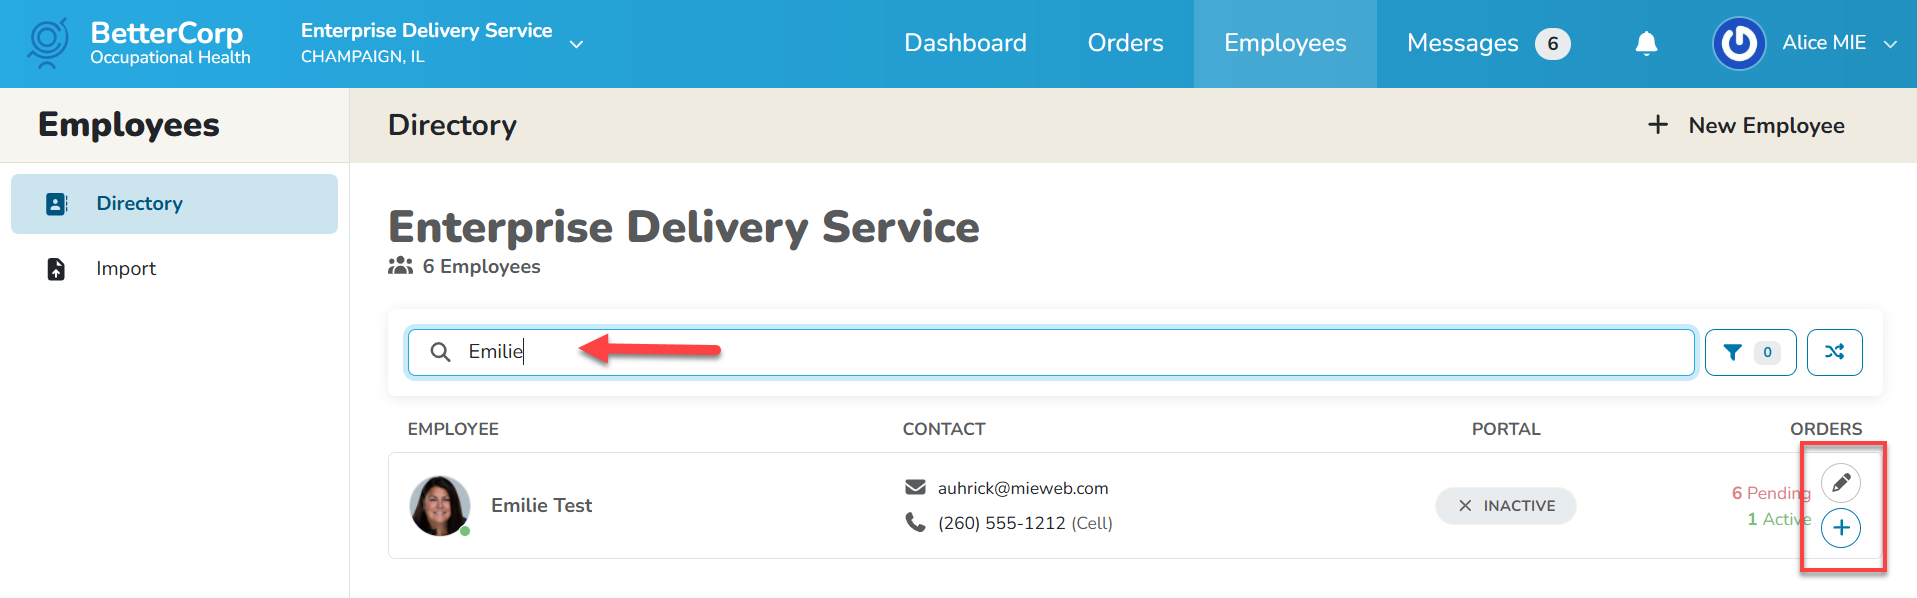
When clicking the PLUS icon from the employee list, the user is taken directly to the Available Services screen to select the desired services to be performed. This is the fastest way to initiate an order.
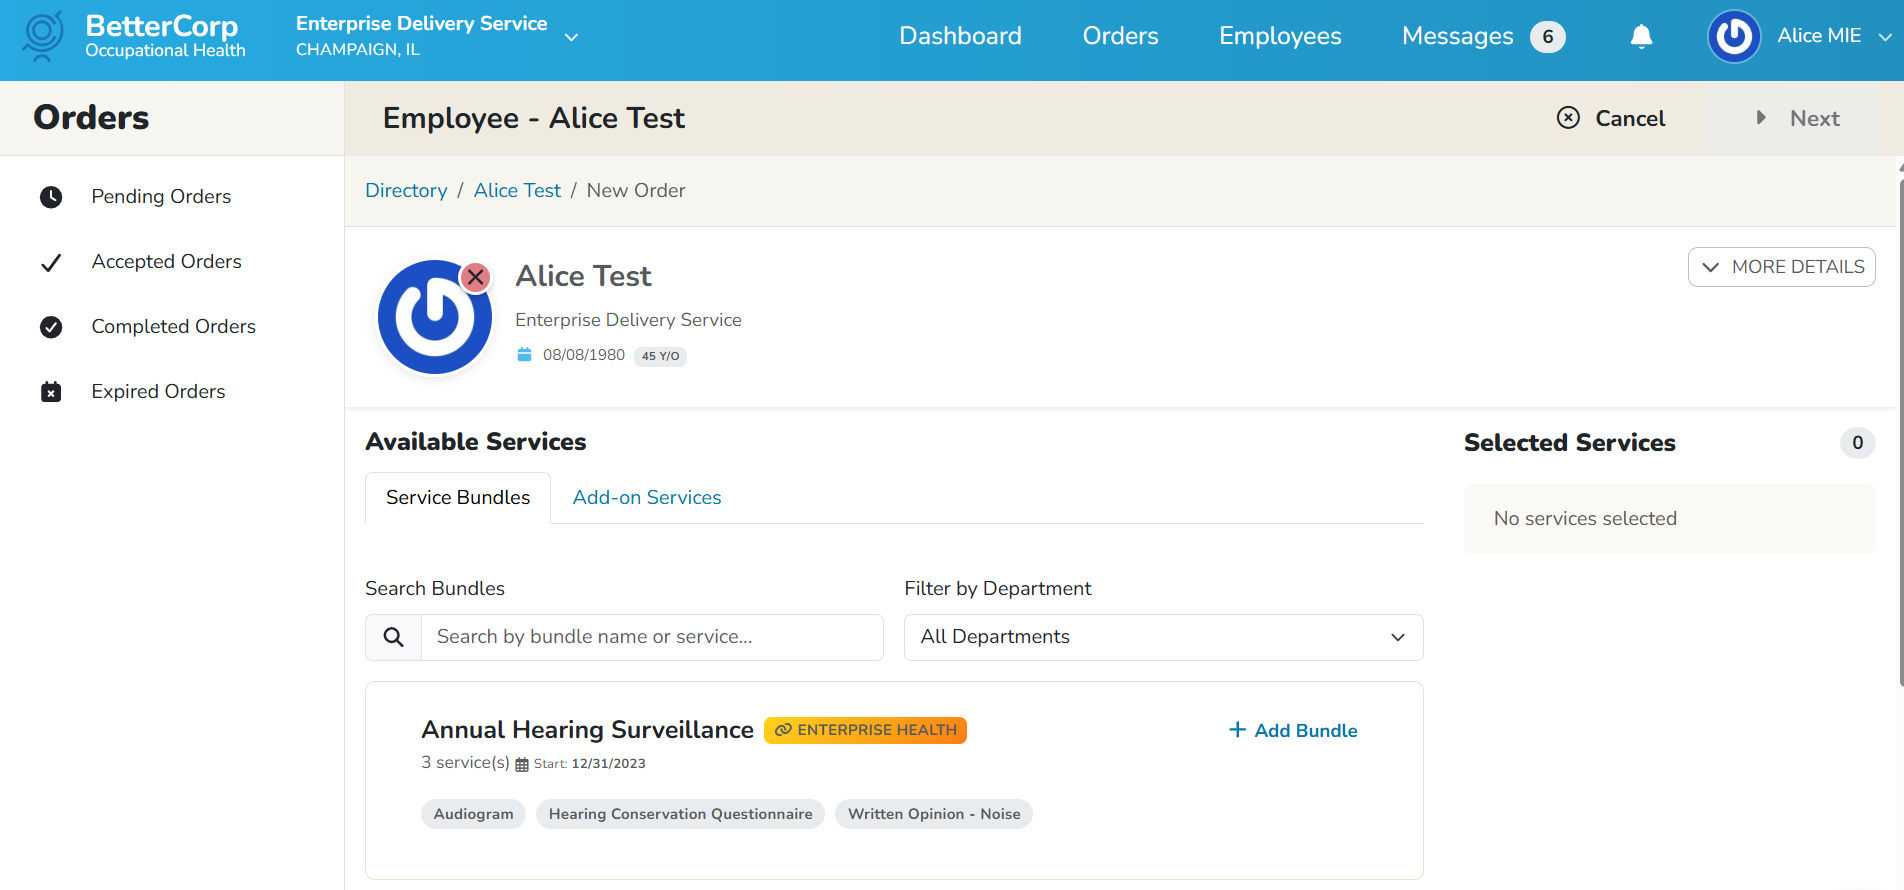
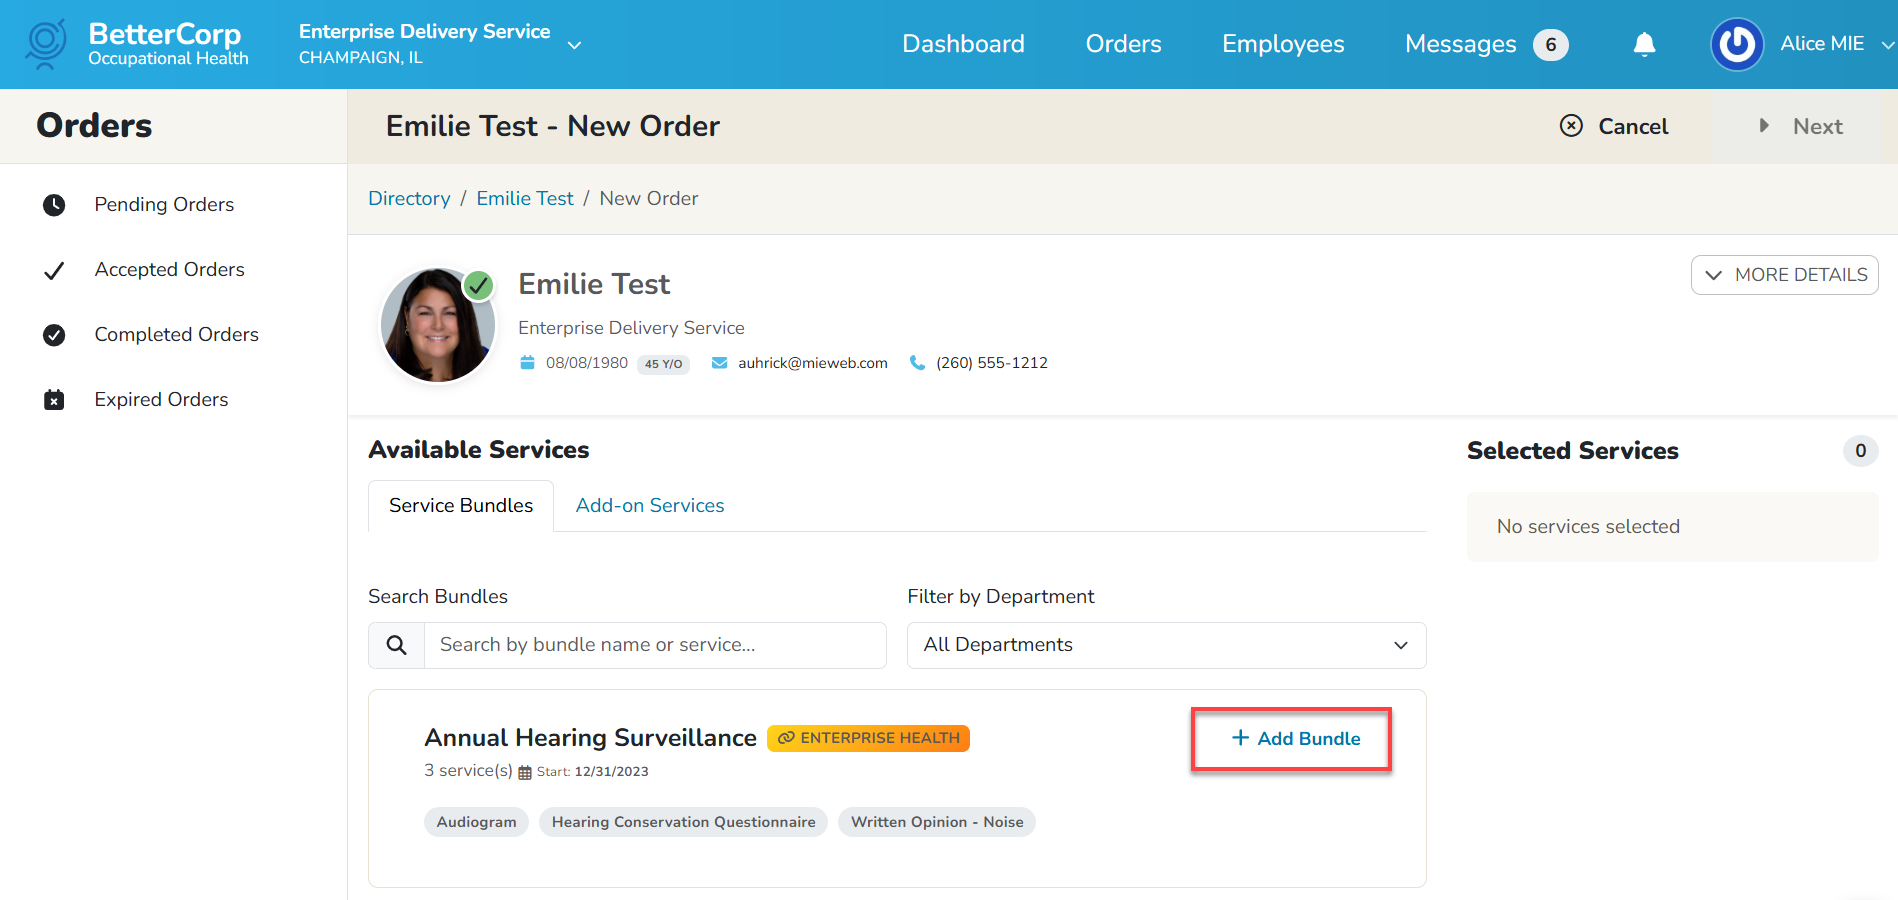
Click the +Add Bundle button to add the services included in the bundle. Bundles are the Deals that have been defined in Enterprise Health.
Note: Bundles may also include administrative forms required for services to be performed.
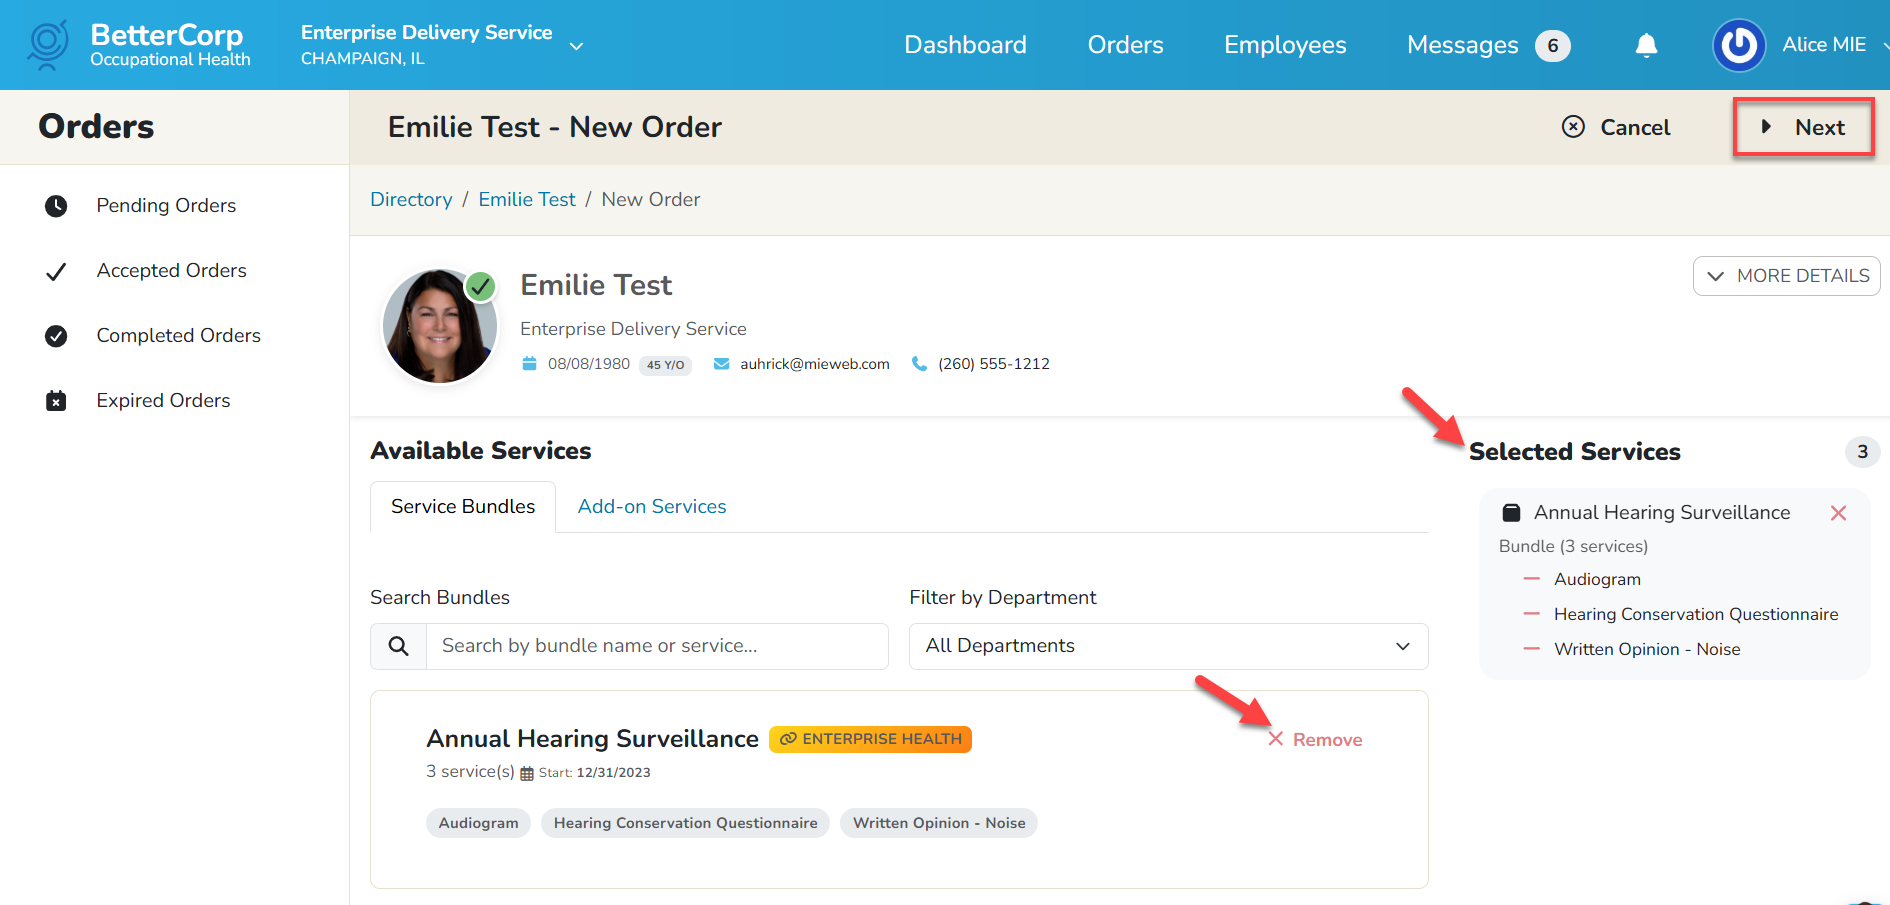
Added bundles will display in the Selected Services list on the right hand side of the screen. If the wrong bundle was selected, click the X Remove option on the bundle to delete the selected services. If the orders are correct and complete, click the Next button to proceed.
 BlueHive will display a list of providers within a 50 mile radius of the employee’s zip code. Employers should look for service providers that can perform all services, but can select multiple providers to complete services if necessary. The employer may search for a different clinic by changing the zipcode search or by typing in the cite/state of the desired location for the appointment. Click the Search button to refresh the available providers list. Once the provider has been identified, click the Select All option (for providers who can perform all services) to select the provider. If a provider is selected outside of the user adding the order, a message will display that the provider is in a different timezone. The message will indicate the time and timezone that has been requested. Click the Send Order button to submit the order request.
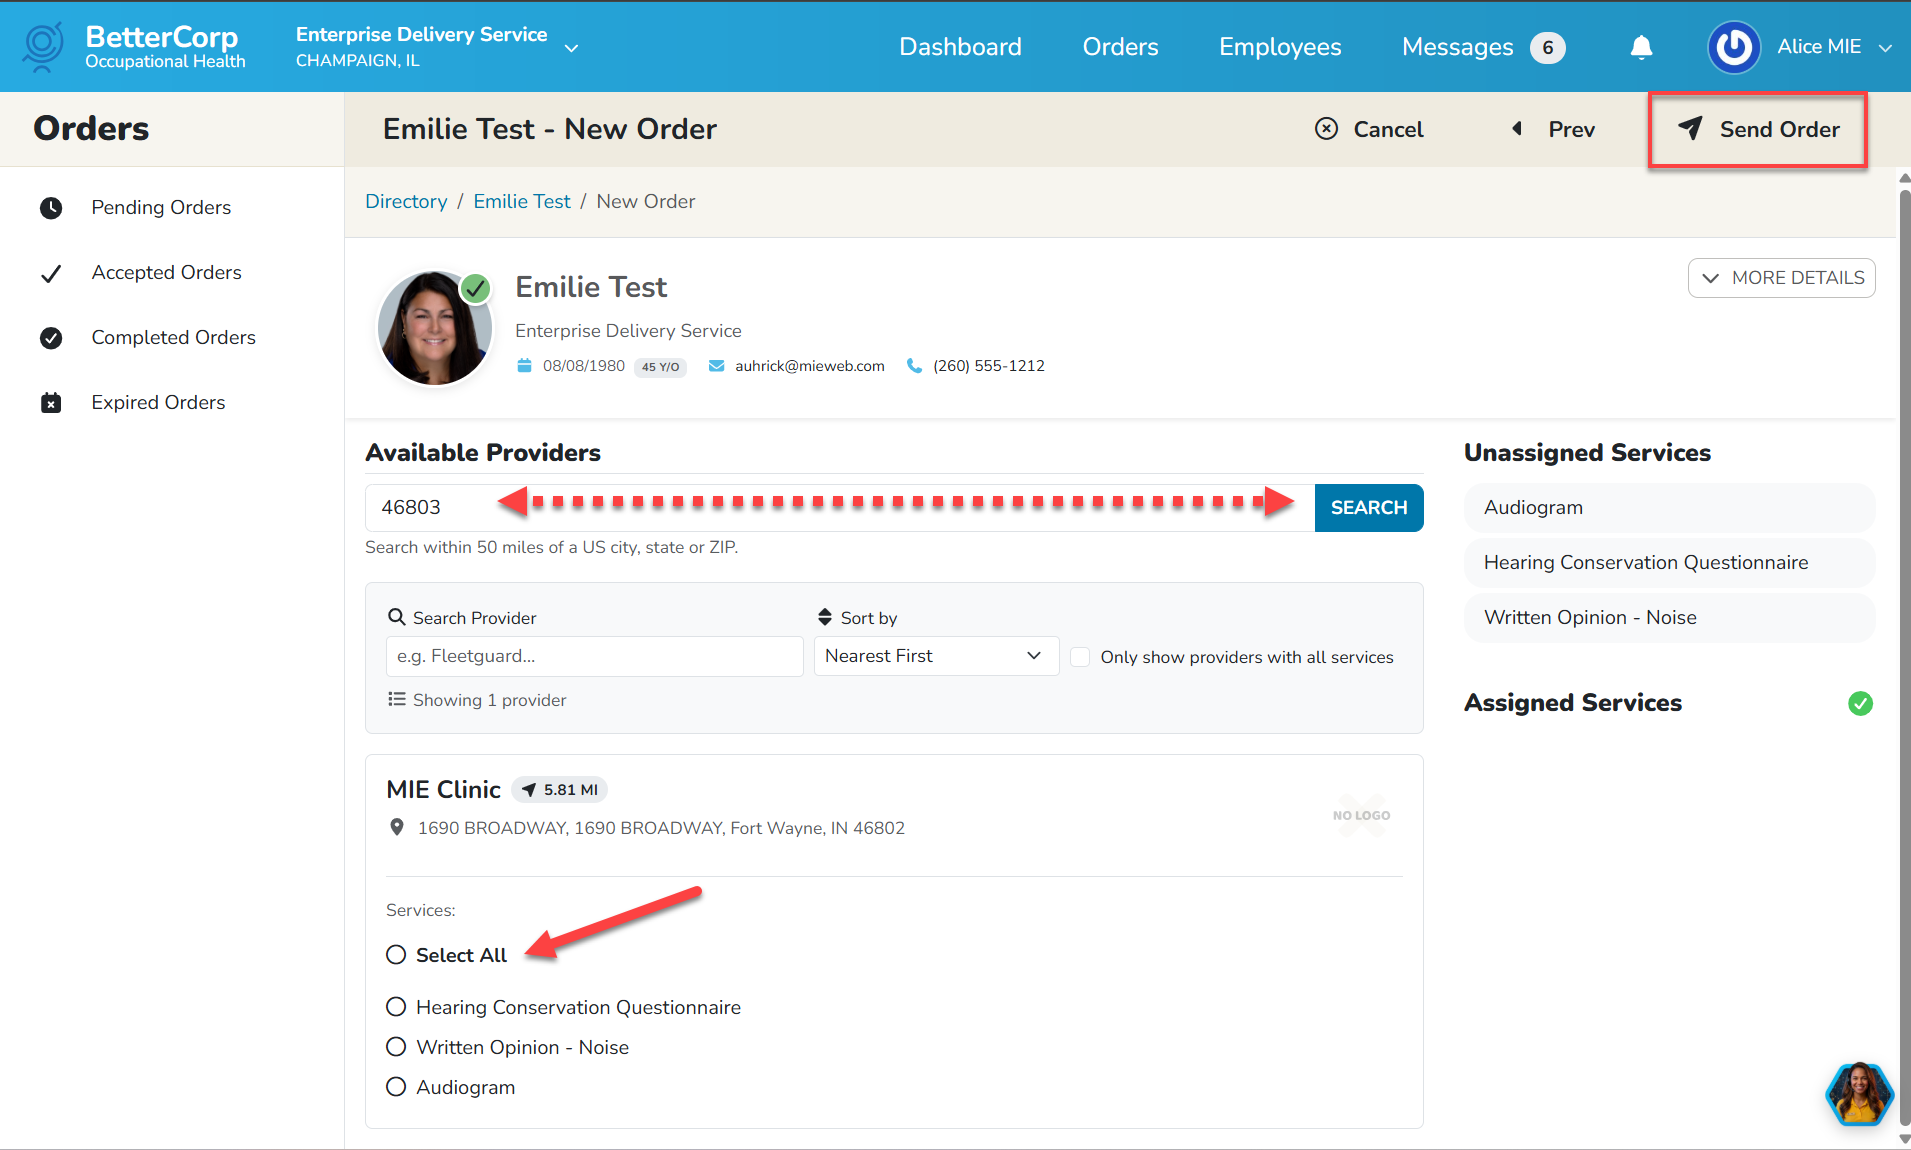
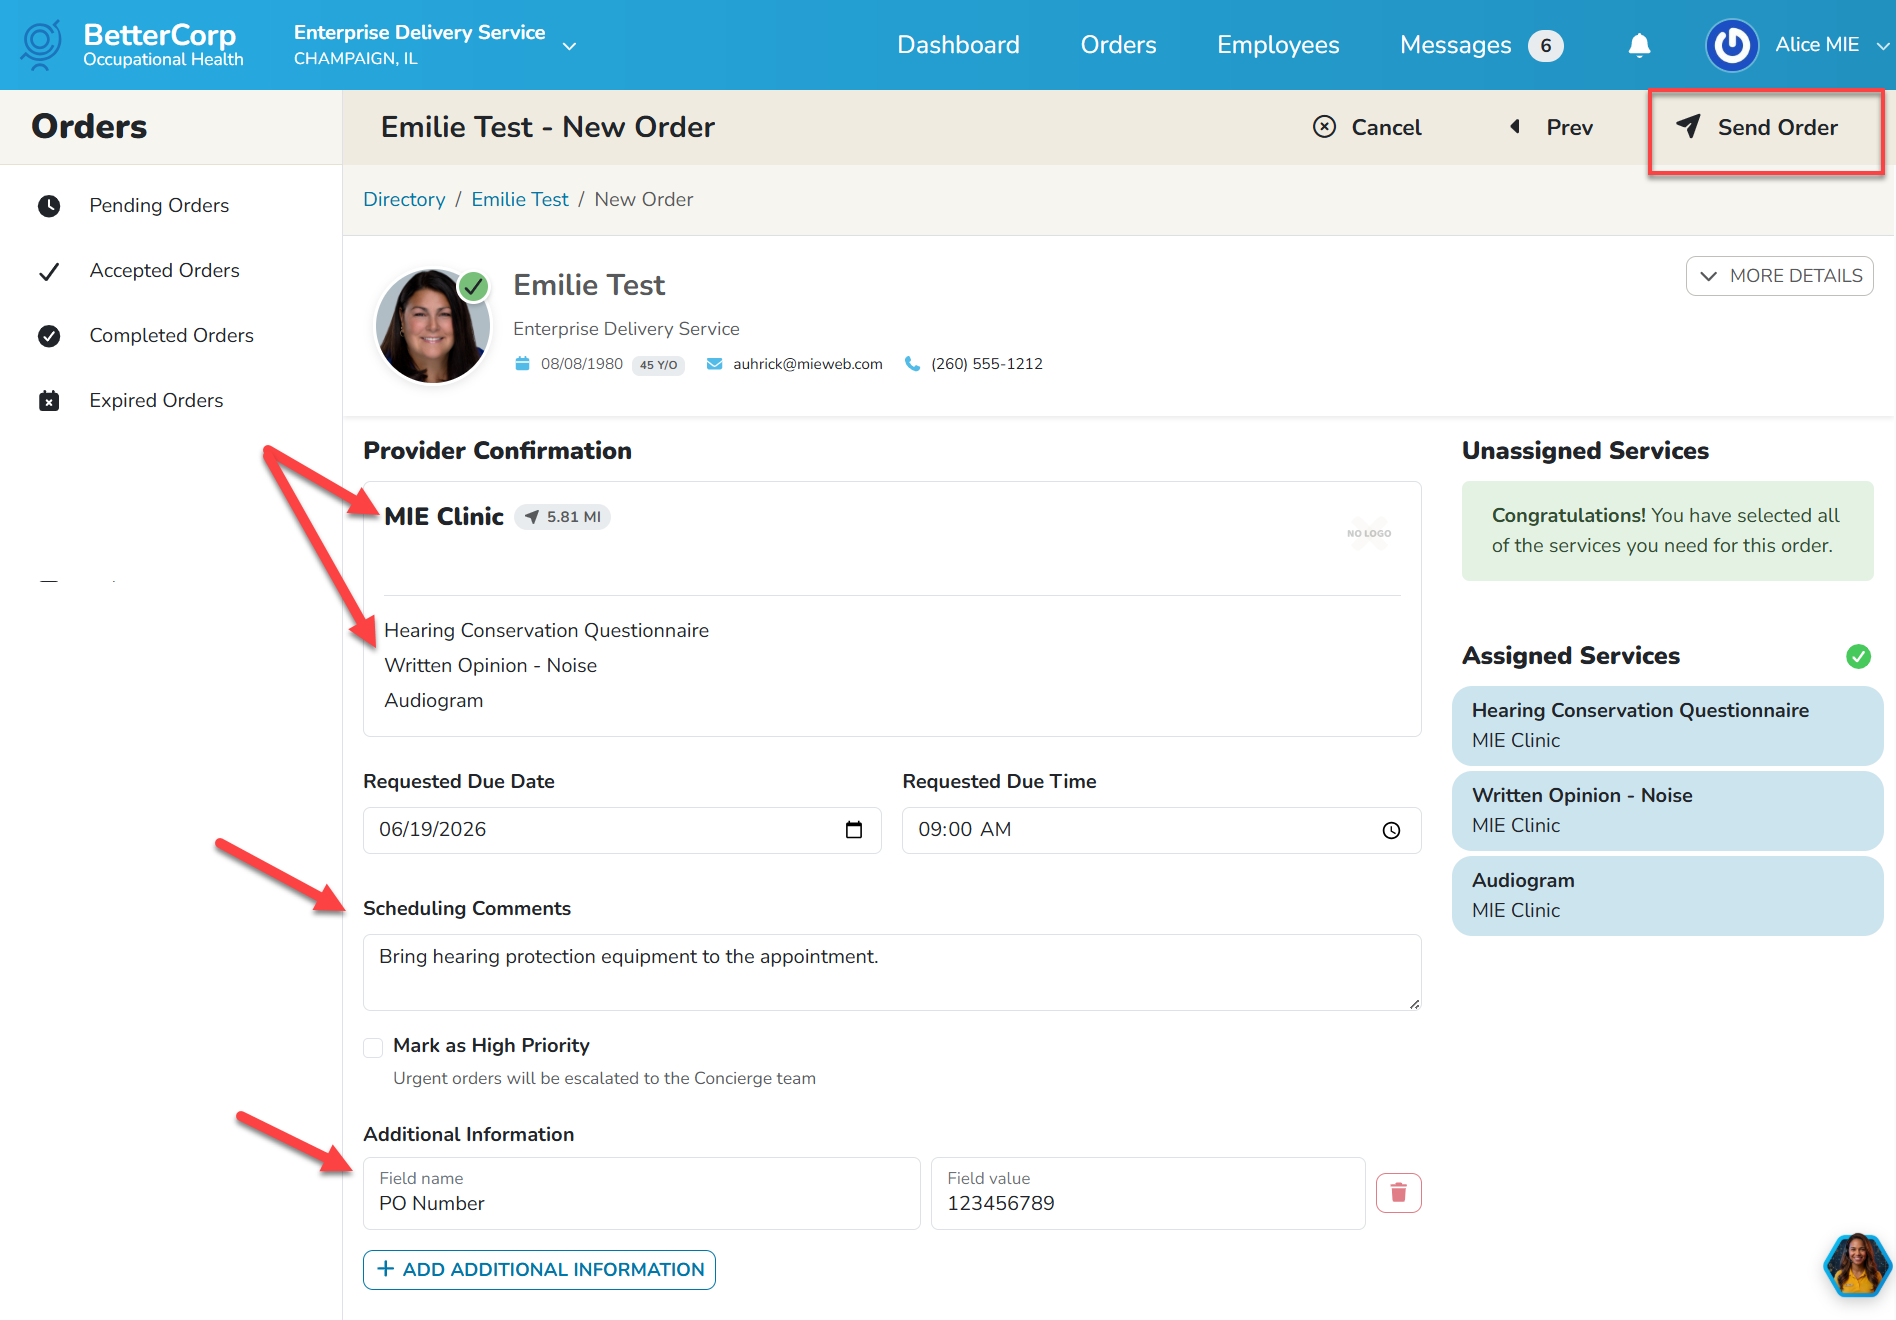
Once the provider has been selected, the page will refresh. A summary of the services and provider will be displayed. The system will default the Requested Due Date for 3 days from the current date (unless modified by the Portal Sponsor). Employers may enter a date and time in which they would like the employee to go to the clinic for their appointment. Scheduling Comments may also be added or left blank if not applicable. Please note: these comments will display on the appointment confirmation email that is sent to the employee. Employers may also use the Add Additional Informational button to add additional information configured by the Portal Sponsor. Please enter this information if required by the employer for billing purposes. When the information has been entered, click the Send Order button to send the orders to the Portal Sponsor.
Please note, if the provider selected is in a different time zone than the user creating the appointment, then the user will see a notification that the appointment was scheduled in a different timezone and highlight the correct time and timezone.

Users will see a pop up message in the lower right hand corner of the screen if the orders have been successfully sent. Users will then be redirected to the Orders Status timeline.
Please note: the option to type a message to send to the provider has been disabled. A future release of BlueHive will hide this option and can be ignored at this time.
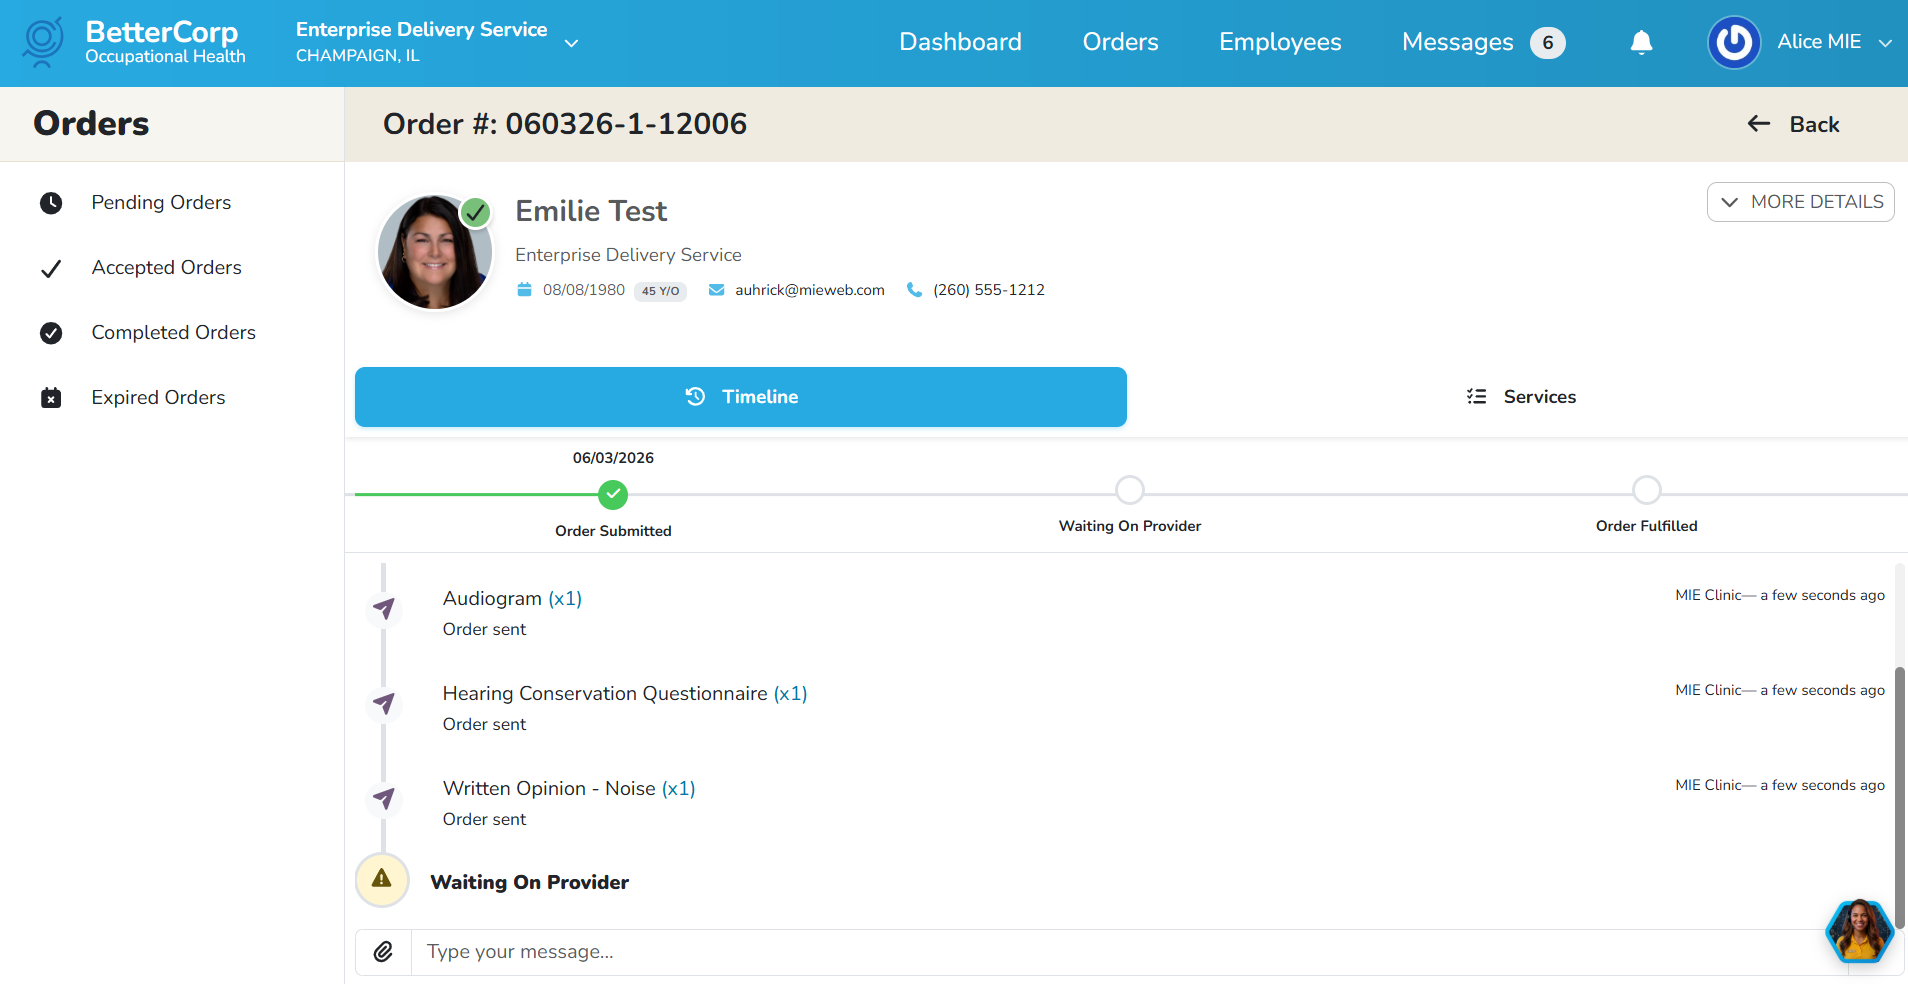
Clicking on the Services tab will display details entered on the order.

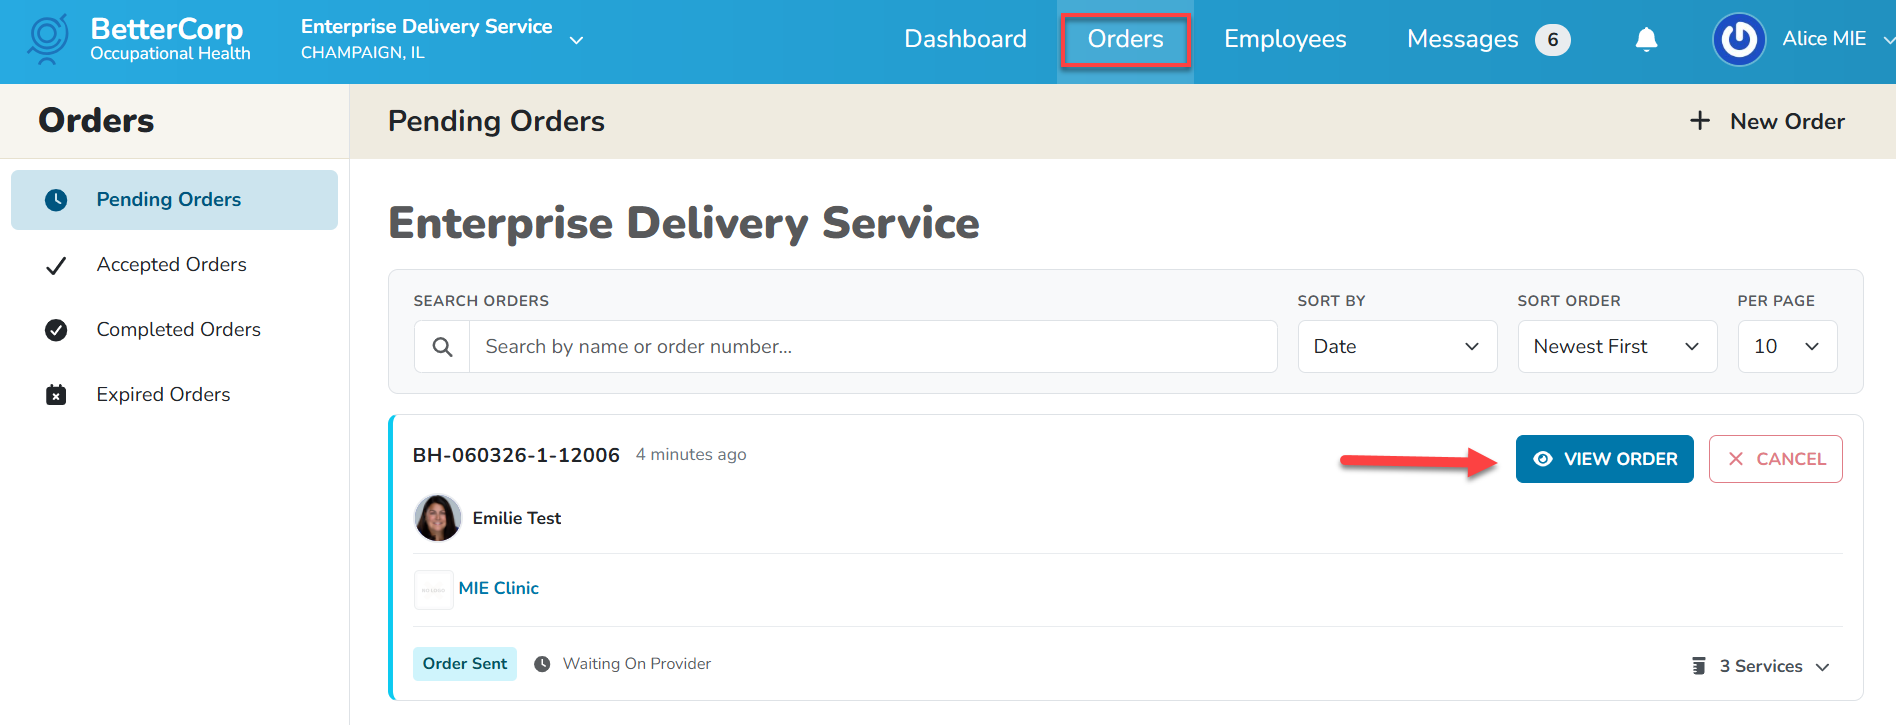
Employers may return to view the order status by navigating to the Orders tab, then clicking the View Order option for the desired employer/order.
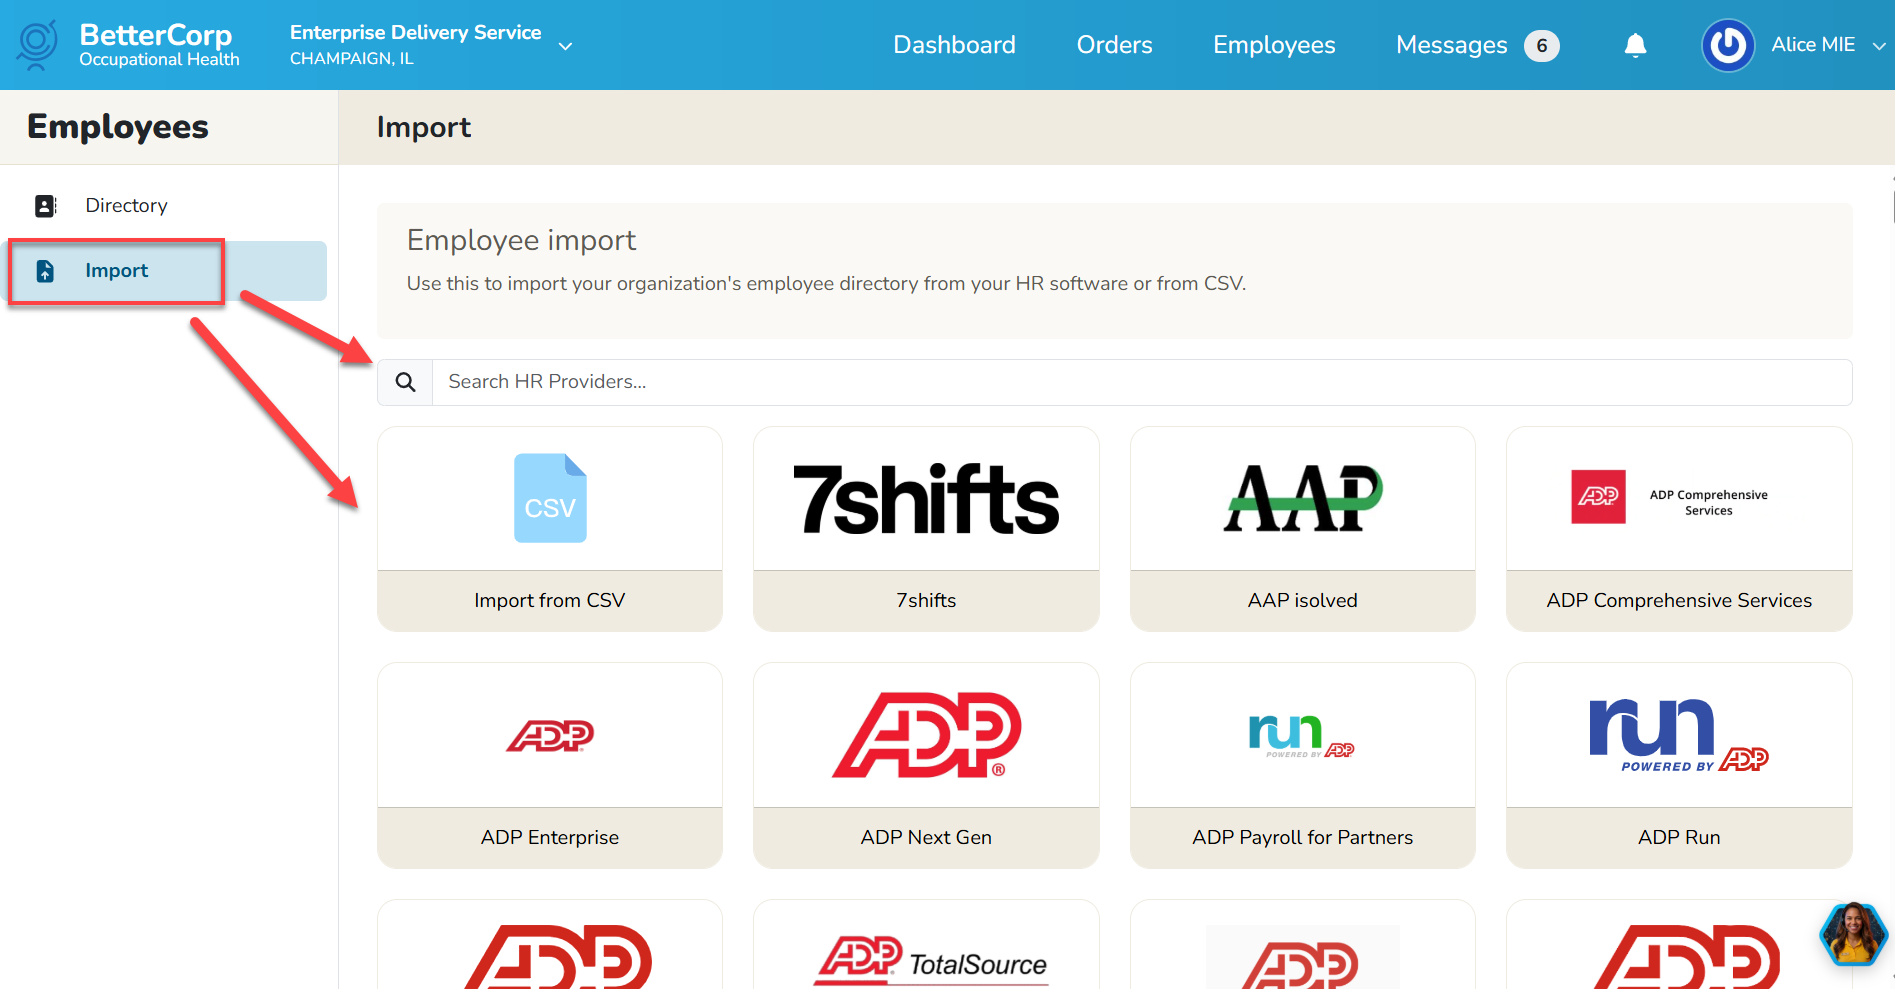
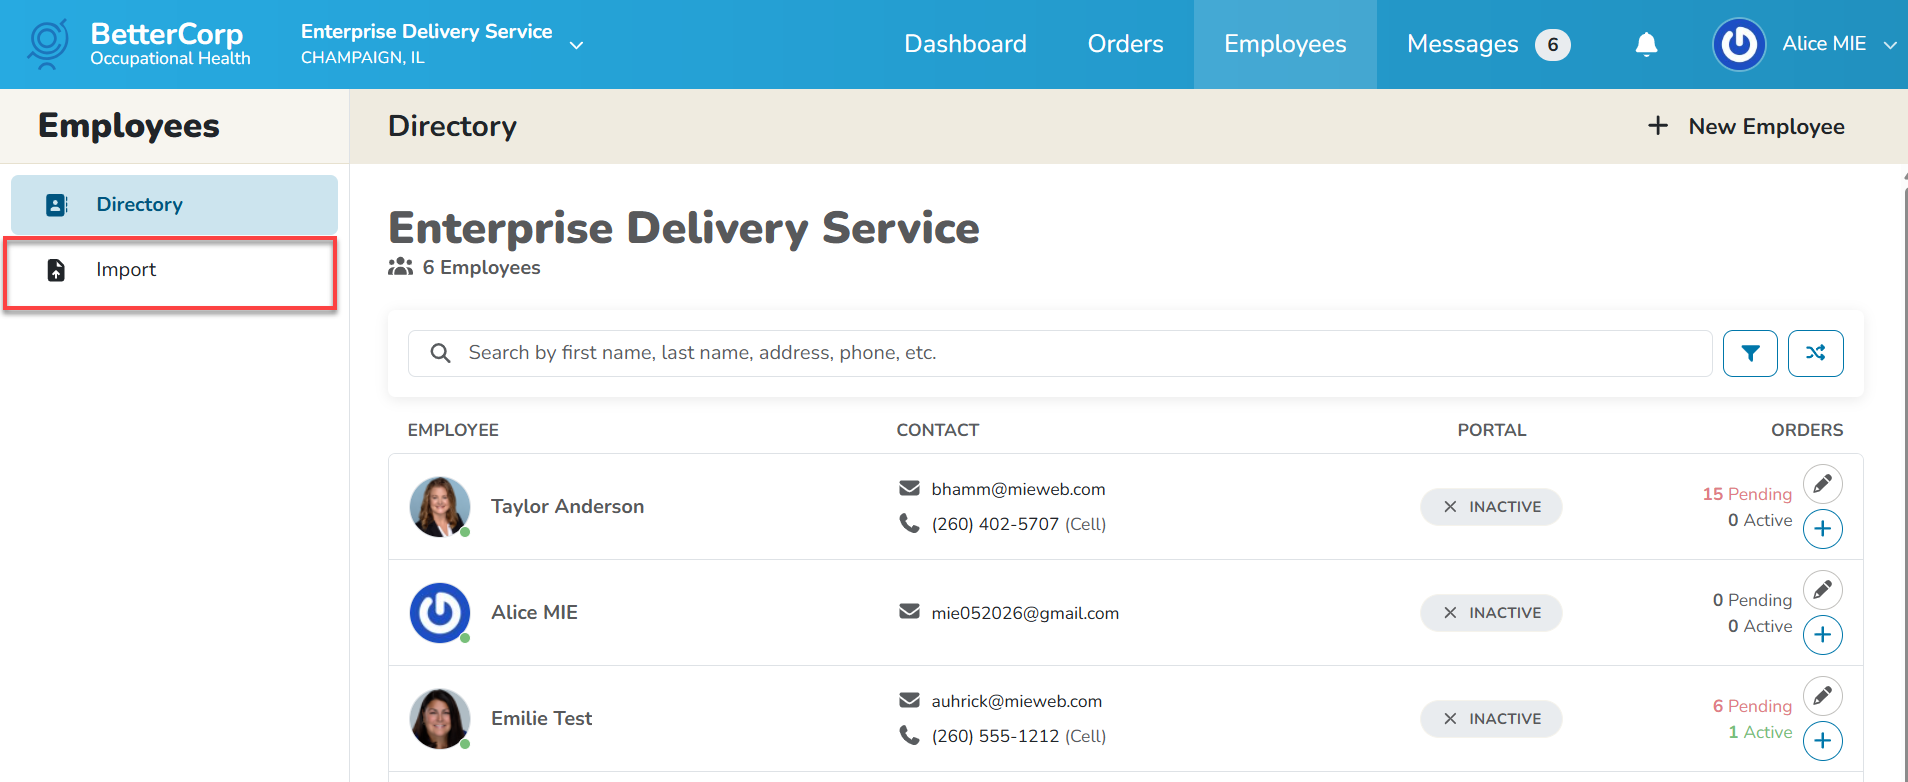
Import Employee List from HR Software
Navigate to the Employee tab and select the Import option.
Use the Search option to search for the appropriate HR system. Click on the desired HR system, then follow the onscreen prompts to import employees from a CSV, or from an HR software system.