
The Enterprise Health system is designed to allow HTML documents to be uploaded as documents into charts, as needed.
Add a HTML Document to Chart
To begin creating a HTML document in a chart, navigate to the Document Library by clicking any of the Add Document links, found throughout the chart. Once clicked, the library will load, and the HTML filter link can be selected to reduce the available documents. Selecting the HTML filter link will show only document types that are available for upload as a HTML file.
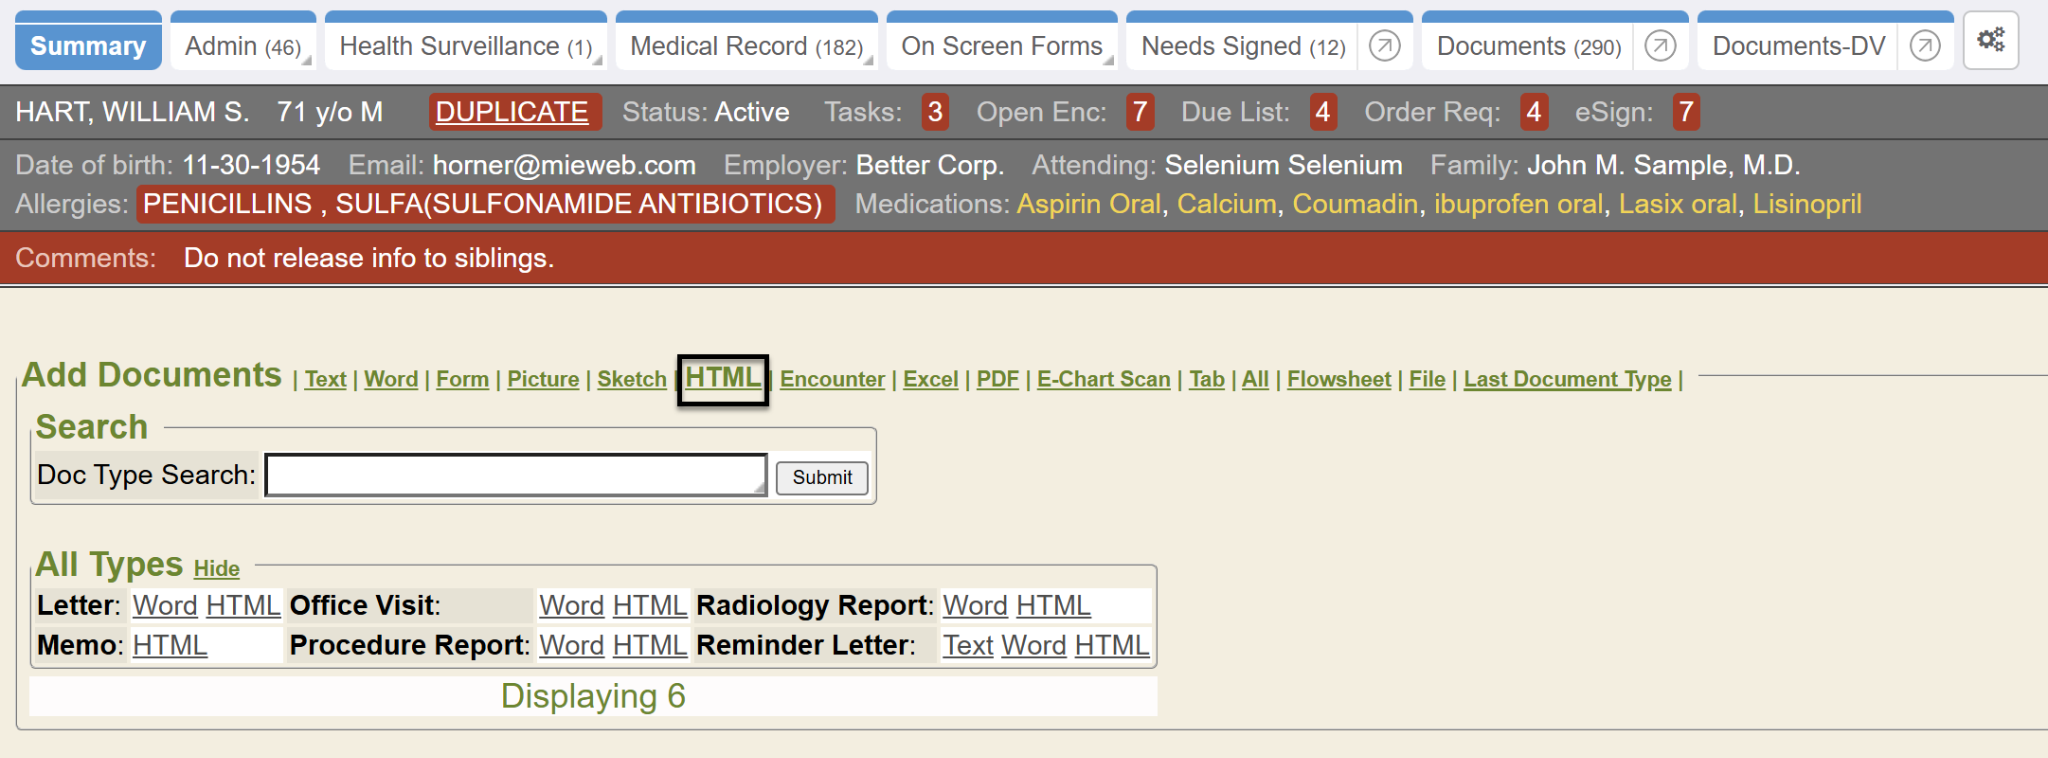
Select the document type needing to be attached and uploaded to the chart by simply clicking the HTML link following the appropriate document name.
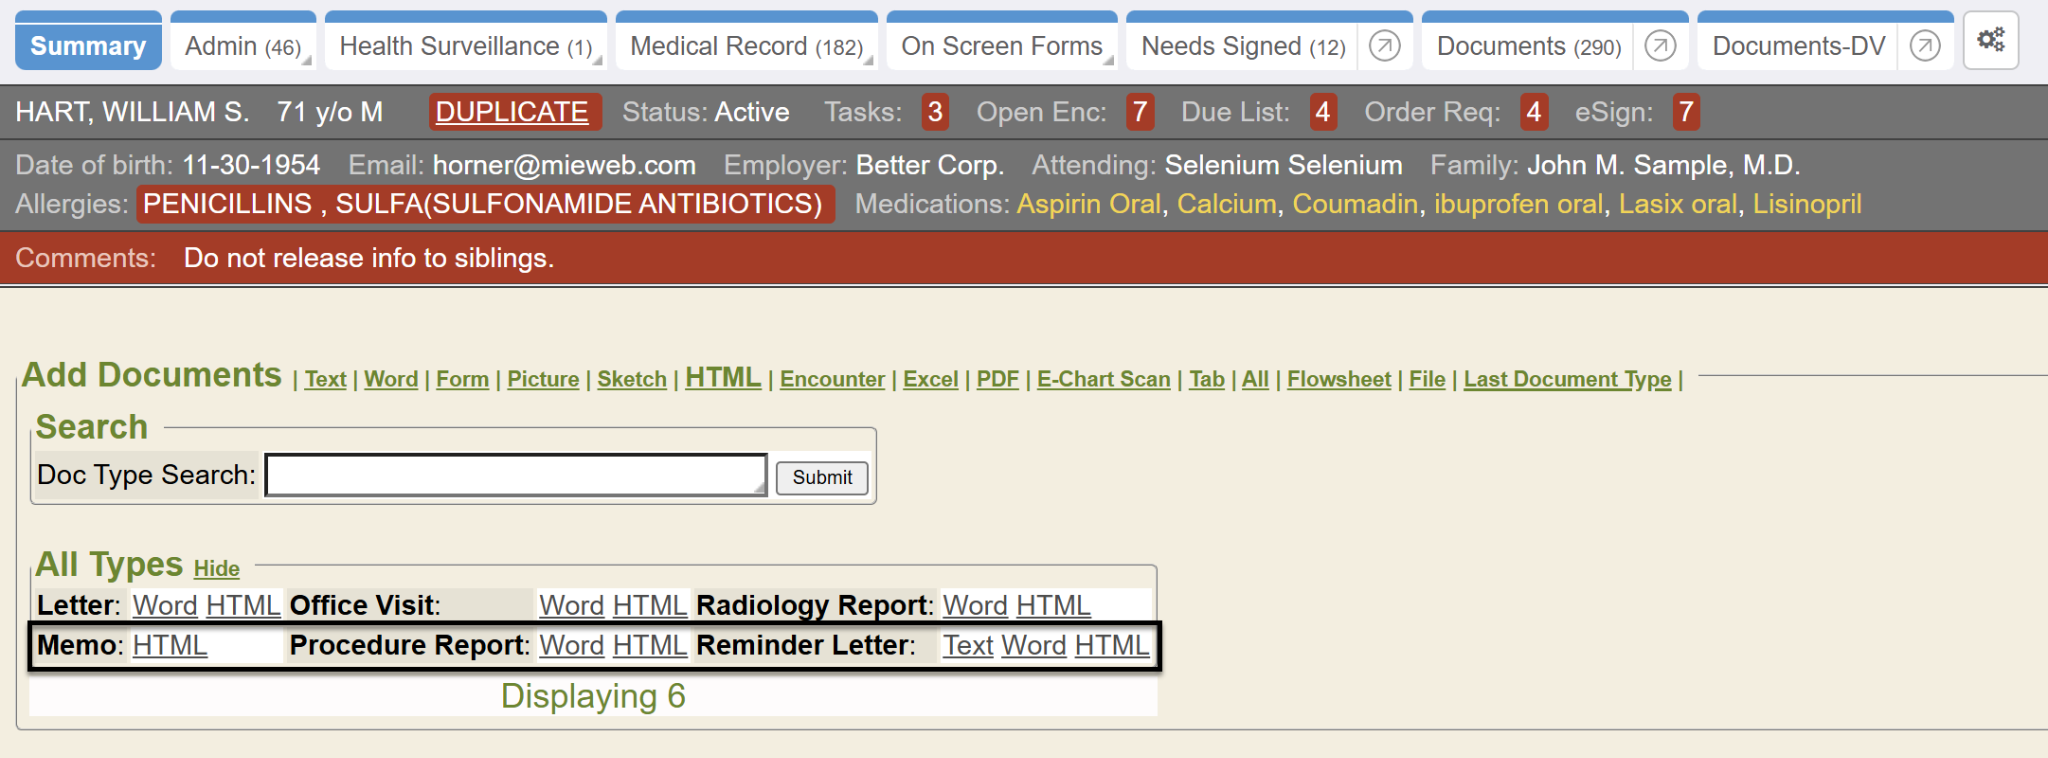
Once clicked, the Add Document Properties window will open. Fill in the available fields, as appropriate.
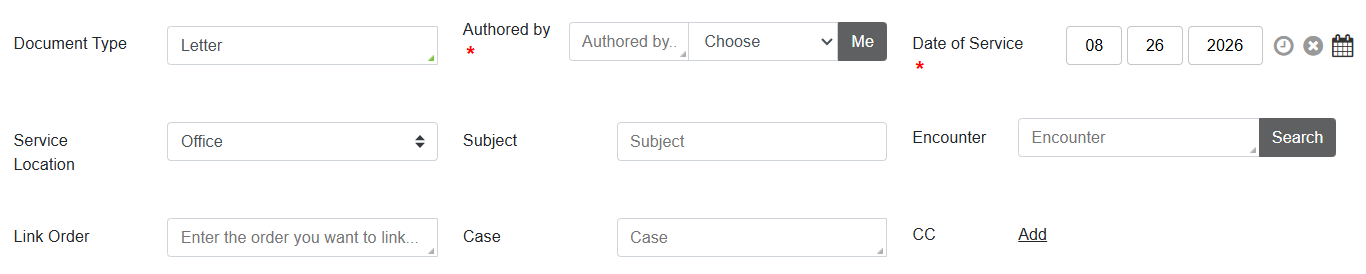
Authored By: Given the proper security permission, use this field to select for whom this document is being authored, or click the Me button if the logged-in user is the author. The logged-in user uploading the file document to the chart is considered the Creator and will be recorded as such in the document properties. The Authored By field is for who authored the document being uploaded.
- In order to author documents for others, the user must have the Access Control Transcribe for Others setting set to Yes. If this setting is not enabled for the user, the Authored By field will not be available as an option.
- The Choose drop-down list of names will populate with list choices of users who are tied to the department specified in a system setting named Webchart / Settings / Physician Realm

Document Type: Select the document type being uploaded and stored in the chart.
Date of Service: Provide the date of service for the document.
Service Location: Select the service location of the document.
Subject: Provide a free-text subject for the document. Subjects can be searched against using the Document Search report, and document subjects will always display on List View summary pages where the documents are displayed.
Encounter: Enterprise Health allows documents to be linked to encounters, as needed. Specifying an encounter ID will link the uploaded document to the specified encounter. If the document does not need to be linked to an encounter, simply leave the field blank.
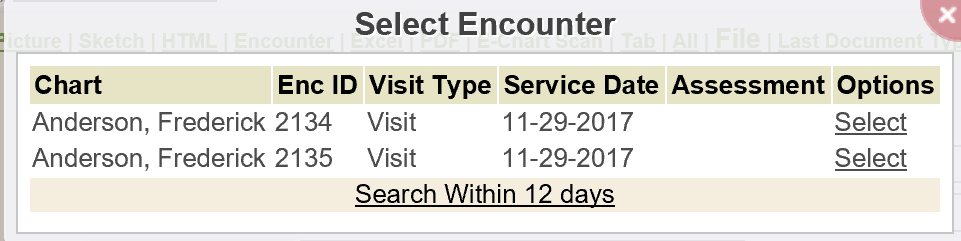
- A Search button is provided to allow for searching of specific encounter IDs for linking. Most users do not know the encounter ID number, so the search is a convenient option for searching encounter details of the chart in context.
- Click the Search button to open the Select Encounter window. By default, the system will search the last 3 days of encounters. If the encounter to link is found, simply click the Select link next to the specific encounter, and this will place the encounter ID and details into the Encounter field.
- Click the Search Within [#] days link to search for and display encounters occurring in increments further out, if necessary. If an encounter does not need to be linked, simply leave the encounter field blank
Link to Orders: Like linking to encounters, HTML documents can be linked to pending orders, as needed. To see pending orders, use the down arrow key (↓) on the keyboard when the cursor is in the Link to Orders field. Select any of the orders needing to be linked to the file document, and once the file is uploaded, the order(s) will automatically be marked as Complete.
Case: Use this field to link the document to a case. To see and select any cases/incidents associated with the chart, press the down arrow key (↓) on the keyboard when the cursor is in the Case field.
CC (Physicians): Using this field allows users to attach any relevant clinicians/physicians for carbon copying, which will then immediately fax or route the information to them, depending on the system setup.
HTML Editor: For HTML documents, an HTML template will be available for editing. HTML templates can be configured by MIE or system administrators, if necessary. When there is no pre-programmed template, the textbox will be blank, and text can be added, accordingly. If a template has been configured for the document type, be sure to follow the template, filling it in and typing where is appropriate; however, additional text can always be added, even when a template is being used.
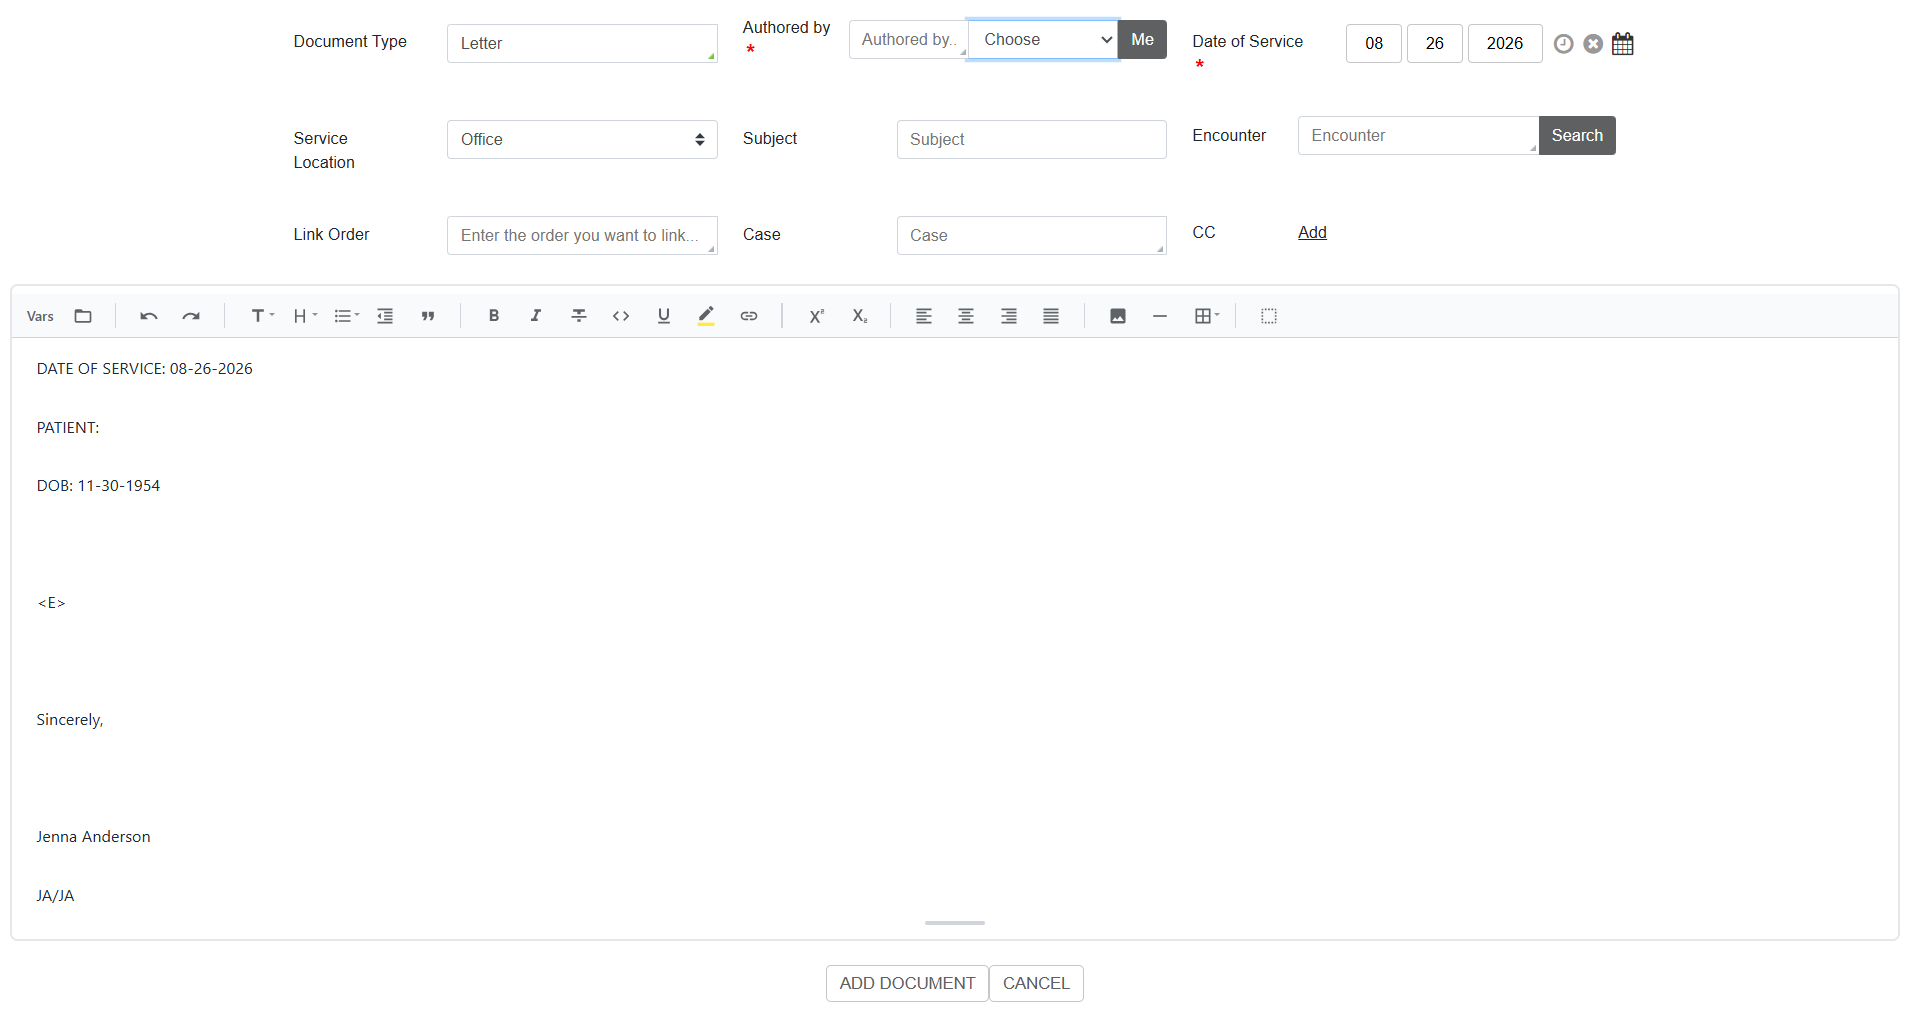
HTML Template Editor within Document Types
To create a new HTML Template, go to the Document Types within the Control Panel. Add a new Document Type or edit an existing document type. When adding the document type, make sure the HTML option is selected in the Document Addition Methods at the bottom of the page. Click Save when complete.
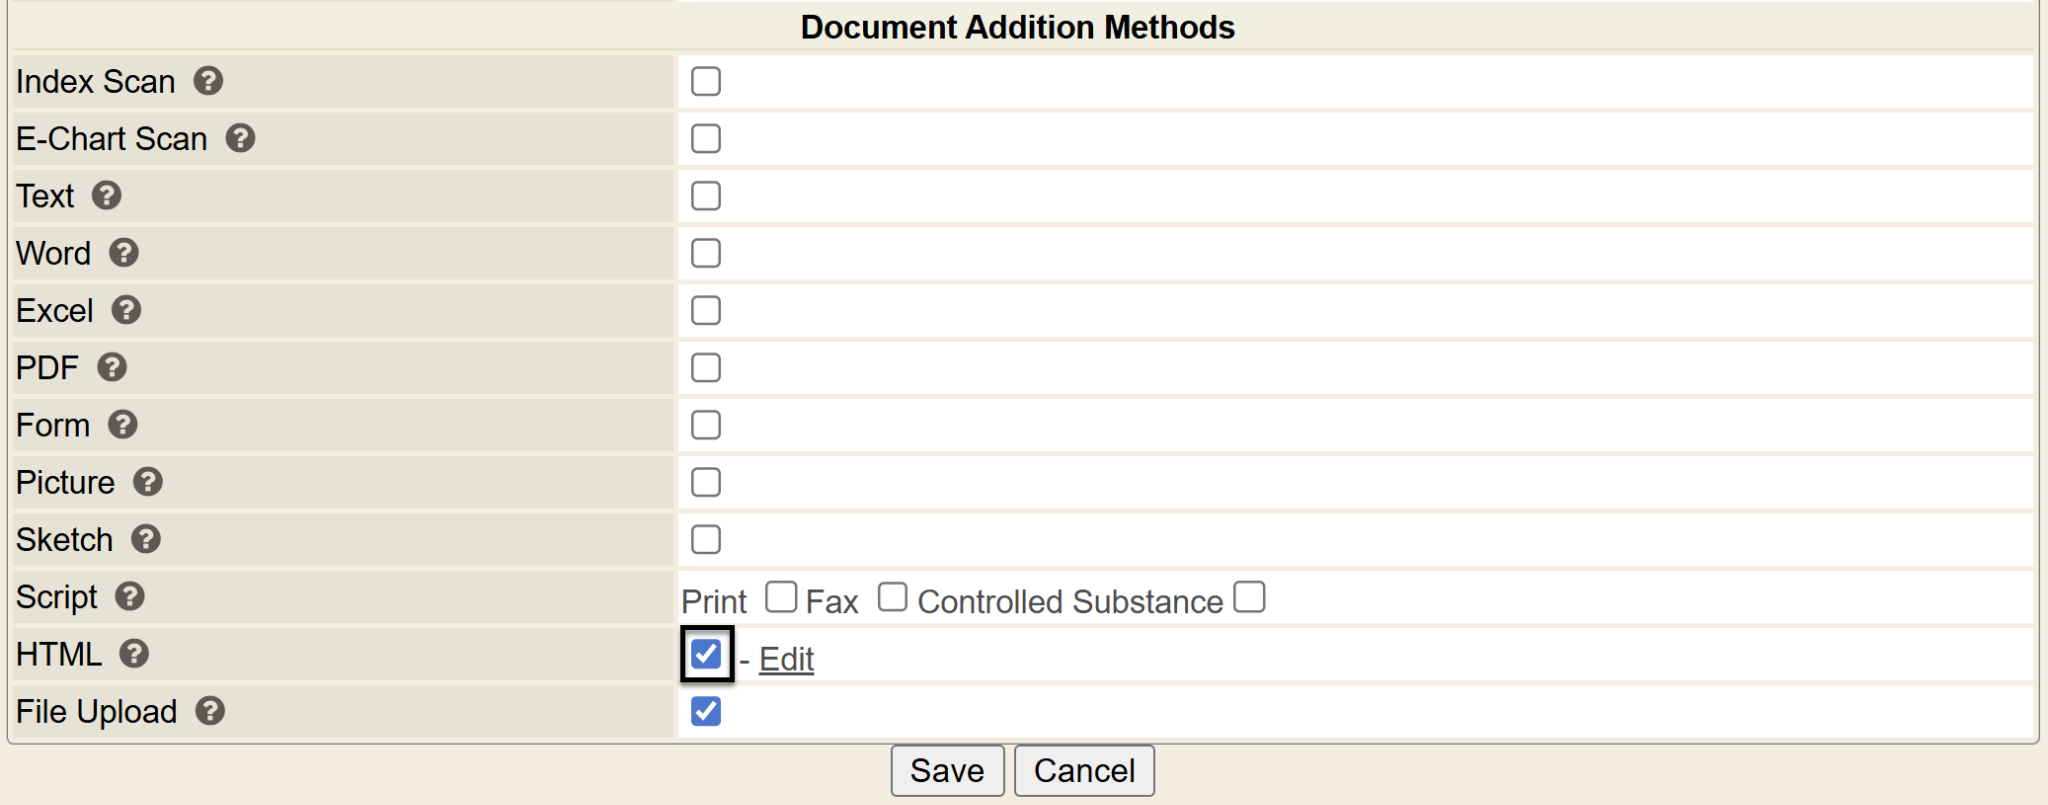
Within the Document Types module, click Edit next to the HTML option to begin creating a template.

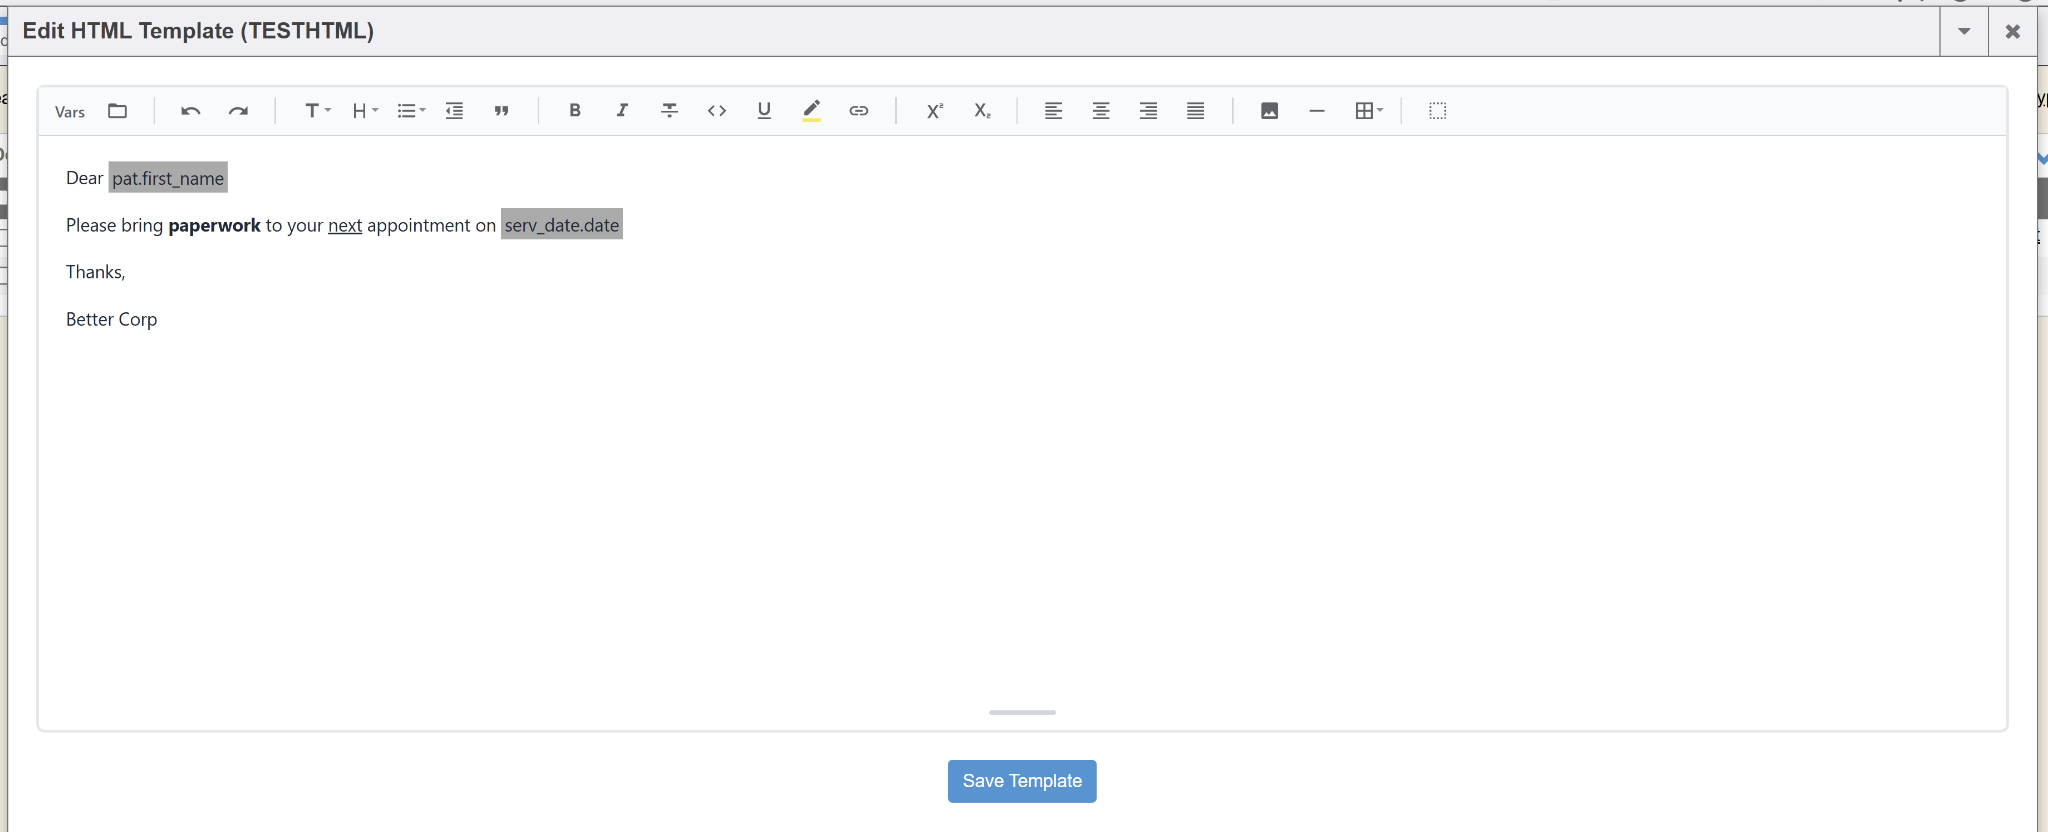
Once in the HTML Editor, begin creating your template.
Vars: These are the different variables or attributes that can be added to your template. When you go to Add Document and open up an HTML document with a template, the variables will be filled in with the appropriate data.
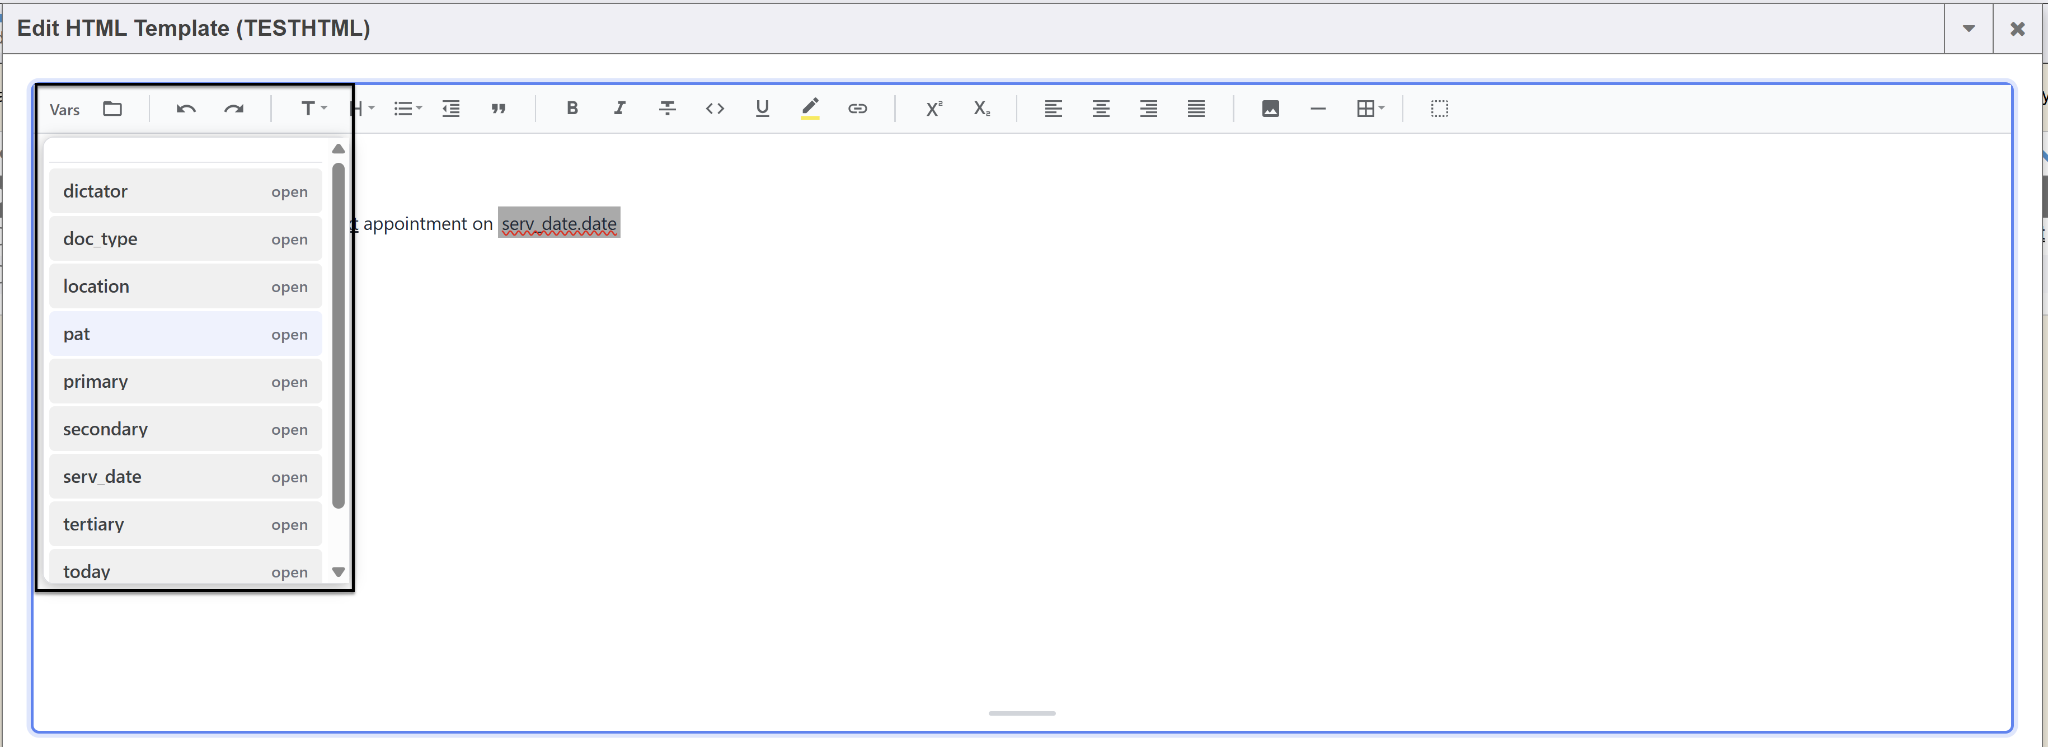
When you click on a Variable, additional options may appear. For example, if you click on pat, additional variables about the patient will appear such as the patient’s first name.
Undo/Redo: The forward and backwards arrows are to redo or undo a previous item.
Type: This is the “T” icon. The options will appear in a dropdown.
Heading: This is the “H” icon. A user can create different headings for the template.
List: This is the bulleted pointed list icon. A user can add bullet points to create a list.
Bold: This is the B icon. Text can be made bold, if needed.
Italicised: This is the I icon. Text can be made italic, if needed.
Strikethrough: This is the T with a line through it icon.
Underline: This is the U icon.
Highlight: This is the marker with the yellow line underneath it icon.
Link: This is the sideways paperclip icon. A hyperlink can be added to the template for a user to follow.
Left, Center, Right and Justified: These options allow a user to have the text align in a certain way, either left, center, right or justified.
Insert Image: This is the picture icon. This allows for a user to add an image to the HTML document, such as a logo.
Table: This is the grid icon. A user can add a table to their HTML document to organize data clearly.
Once the template has been created. Click the Save Template button.