
The Enterprise Health system is designed for users to configure their own picklists. The Orders-Pick Builder allows users to create order picklists for specific protocols, visits and quick lists.
A picklist can only hold order items that already exist in the system, so set up your order items first.
- Order items: Add and configure tests, procedures and other orderable items in Control Panel > Orders > Orders-List Editor. SeeOrders List Editor.
- Permissions: You need access to the Control Panel. Deleting, restoring and viewing history in the Orders-Pick Builder also requires the Manage Order Configuration security permission.
- Picklists vs. Order Panels: A picklist is a list of items users pick from as needed. An Order Panel bundles several items that are always ordered together, and is built separately in the Orders-Panel tab.
Creating and Editing Picklists
The standard product ships with predefined picklists that can be updated to fit an organization’s needs. New picklists can also be created. Each picklist (also called a set) is made up of groups, and each group holds order items. You build all three in the Orders-Pick Builder.
Open the Orders-Pick Builder
- Open the Control Panel sidemenu.
- Select the Orders-Pick Builder tab.
- Use the Set Filter dropdown to view each picklist and its order items.
Create a New Picklist
- In the Orders-Pick Builder, add a new picklist by clicking the Add New Set button.

- Name the picklist by typing the name in the New Set field. Choose the name with care, because the system matches on it (see the naming rules below).
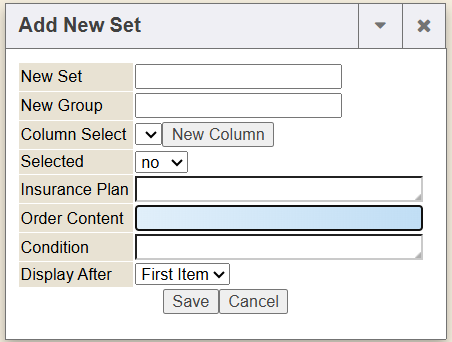
- Name the group by typing the group name in the New Group field.
- Add the Orders by using the autocomplete. Select each order for the picklist using the down arrow as they appear and using the tab button to add.
- Save the picklist.
Add Groups to an Existing Picklist
- Select the picklist in the Set Filter dropdown.
- Click the Plus icon to create a new group
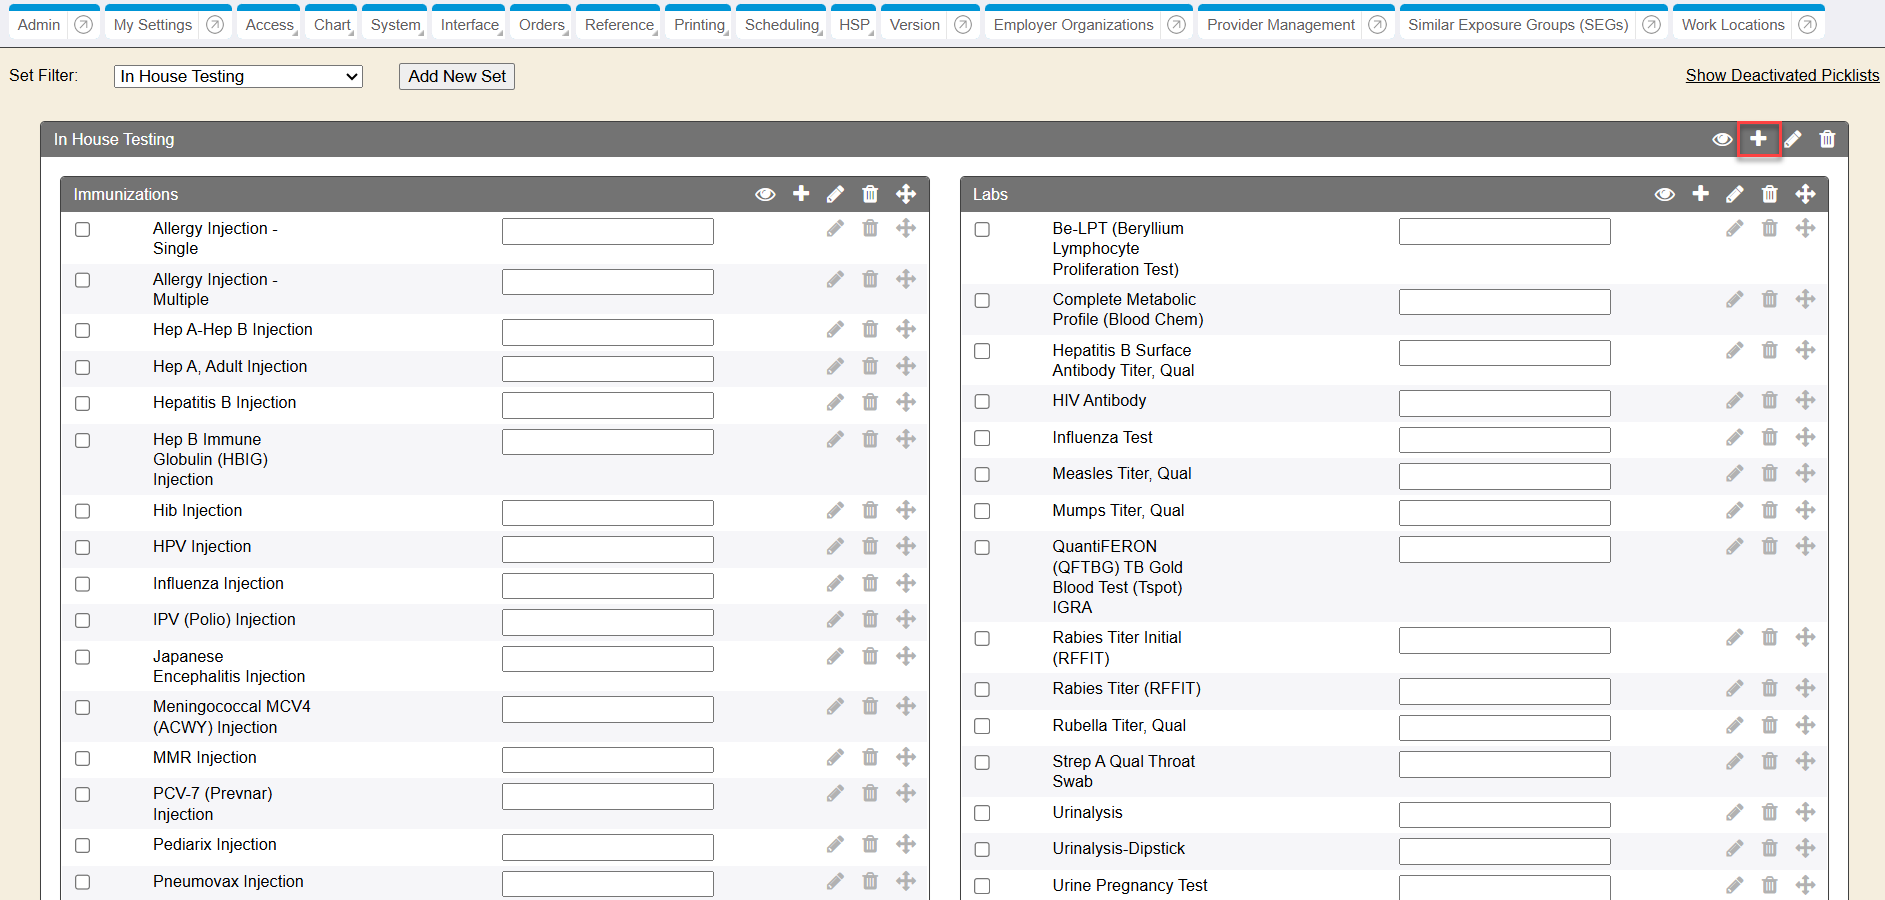
- Name the group by typing the group name in the New Group field.
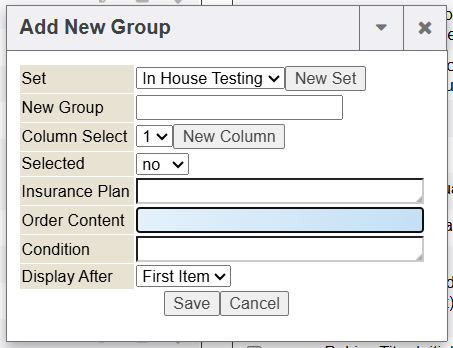
- Add the Orders by using the Order Content autocomplete. Select each order for the picklist using the down arrow as they appear and using the tab button to add.
- Repeat for each group, then save.
Edit a Picklist
Select it in the Set Filter dropdown and add, change or remove its groups and items.
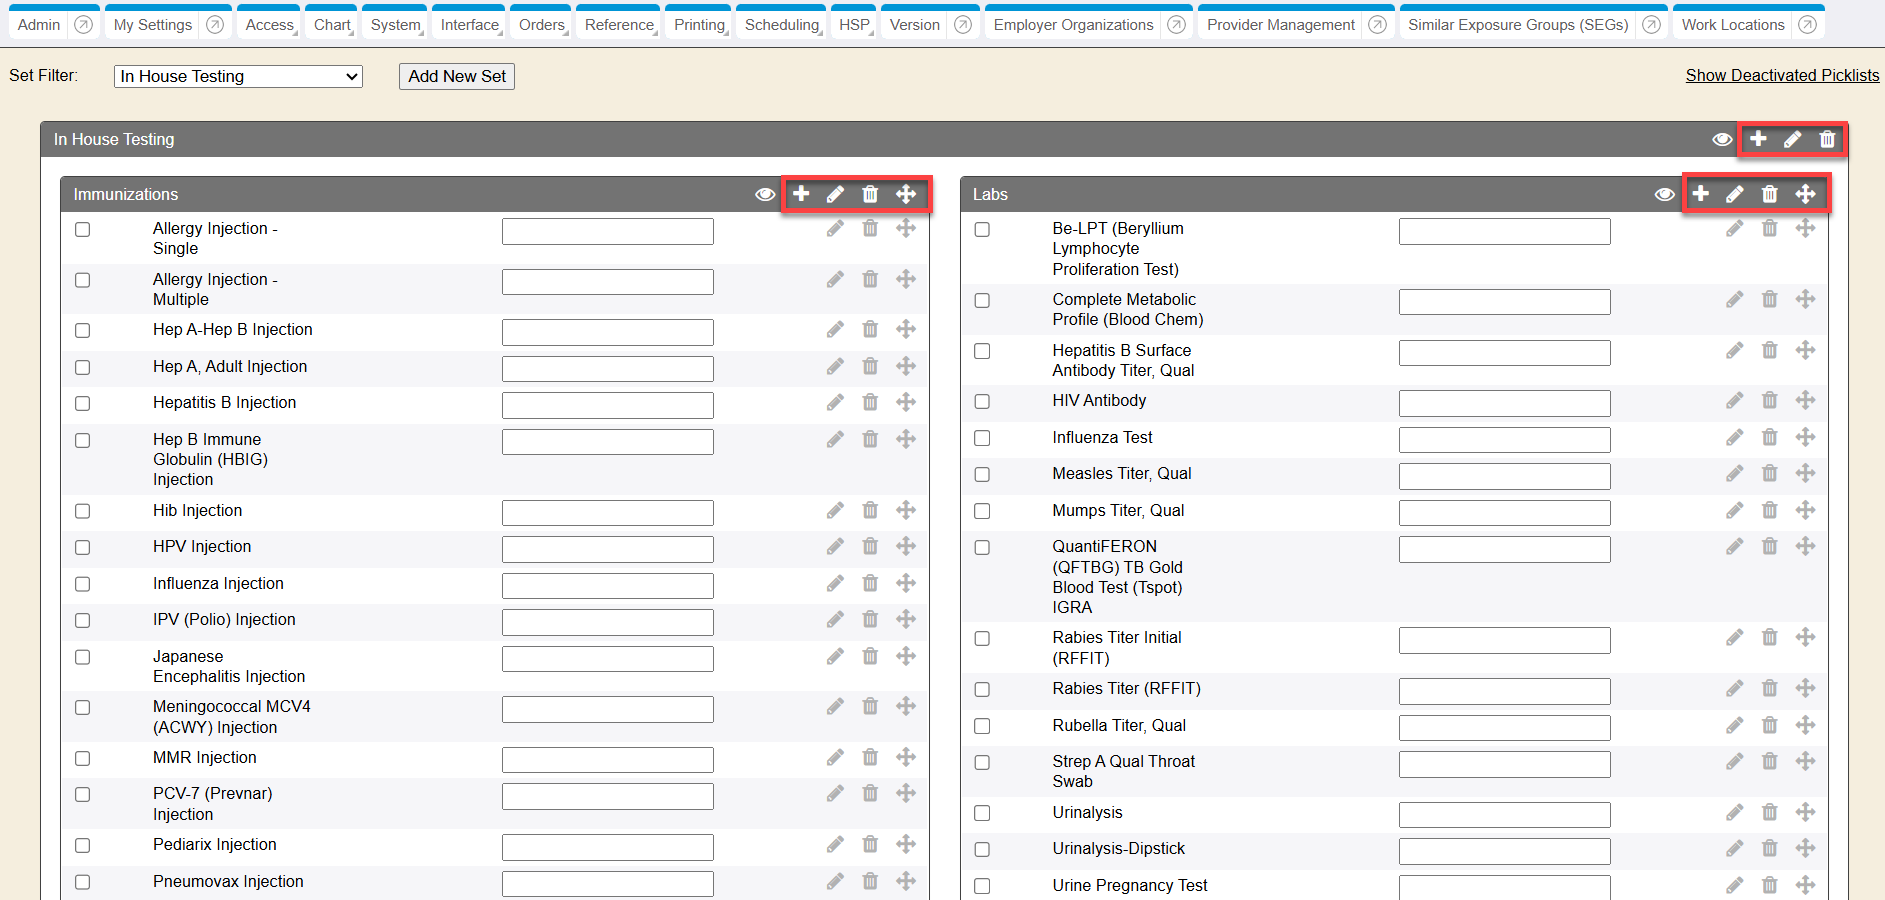
- Plus Sign Icon: When selected at the picklist level, this opens an Add New Group window. When selected at the group level, this opens an Add Item window to add additional orders to the group.
- Pencil Icon: When selected at the picklist level, an Edit Set window opens to rename the picklist. When selected at the group level, an Edit Group window opens to rename the group.
- Trash Can: Used to remove a picklist, group or order. The trash can icon deactivates it rather than deleting it permanently.
- Arrows Icon: Used to move the groups up, down or to the other side.
Deactivating and Reactivating Picklists
Deleting a picklist, group or order item no longer removes it permanently. It is marked Deactivated and can be restored, so an accidental deletion does not mean lost data or a call to the helpdesk.
All deactivate, restore and history actions require the Manage Order Configuration security permission. Confirmation messages now also show more clearly what a deletion will affect.
Deactivate and Reactivate a Picklist (Set)
- To deactivate a picklist, click on the trash can icon.
- To find it later, select Show Deactivated Picklists hyperlink.
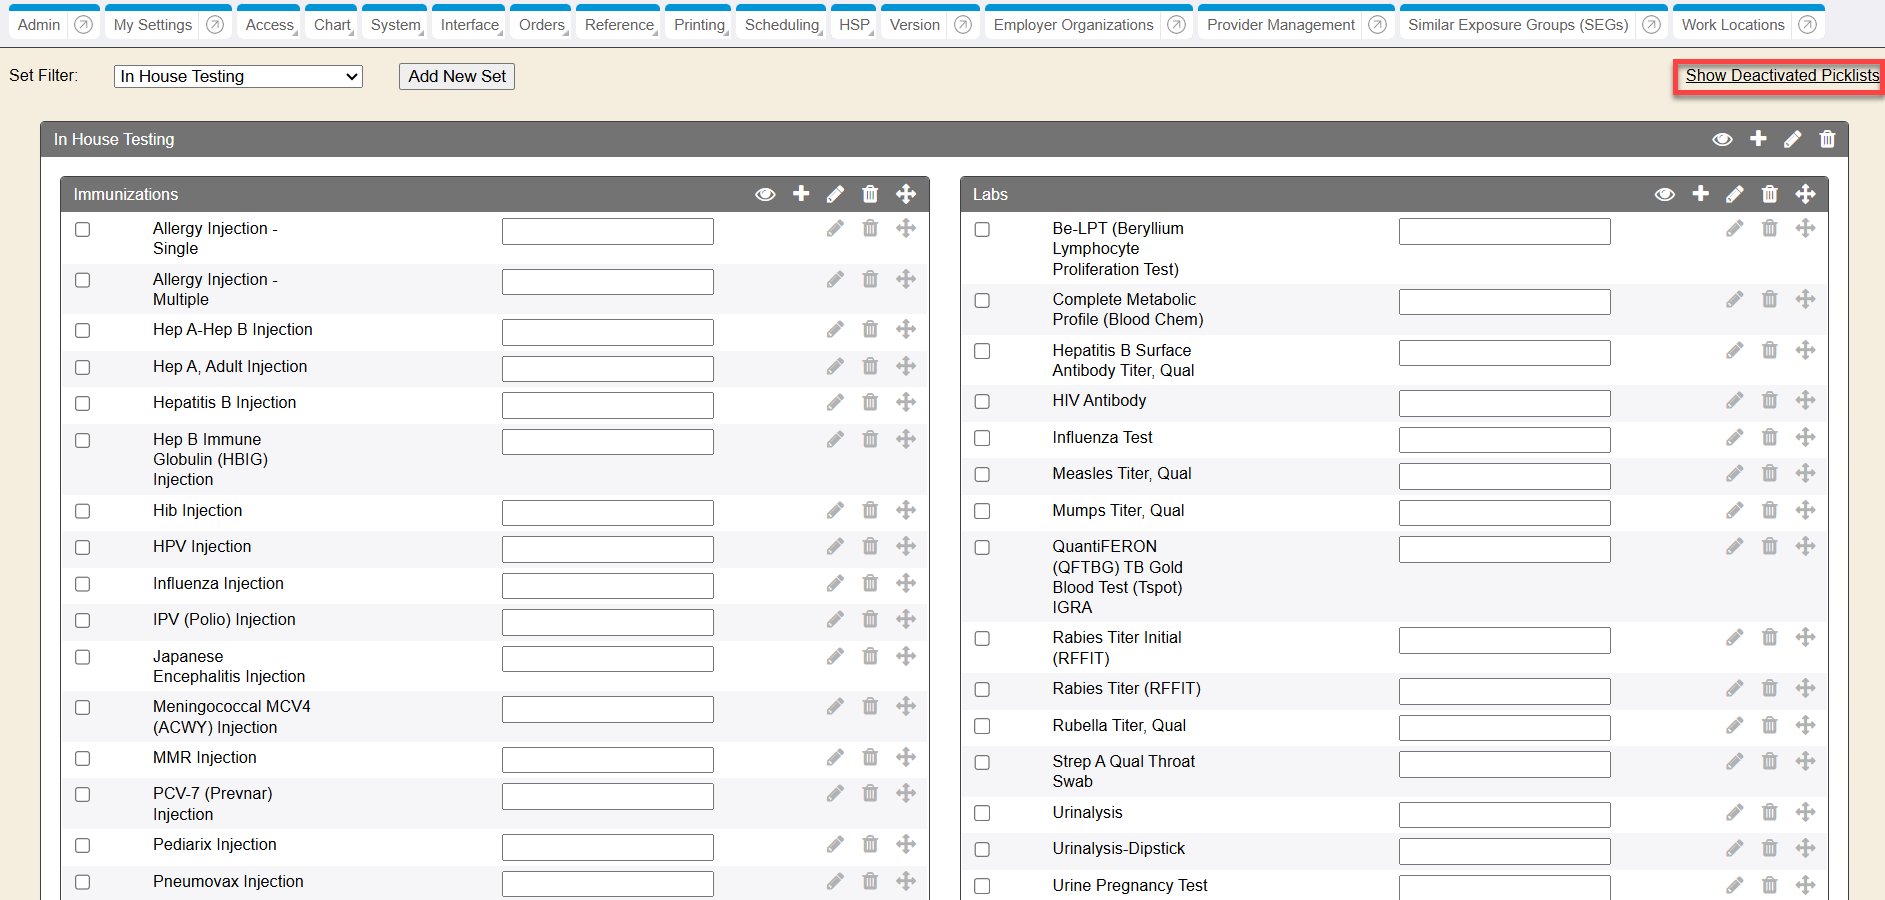
- Reactivate the picklist by clicking on the Lightning Bolt icon. An Alert window opens to confirm this action by clicking the Yes button. The picklists associated groups and order items are restored with it.
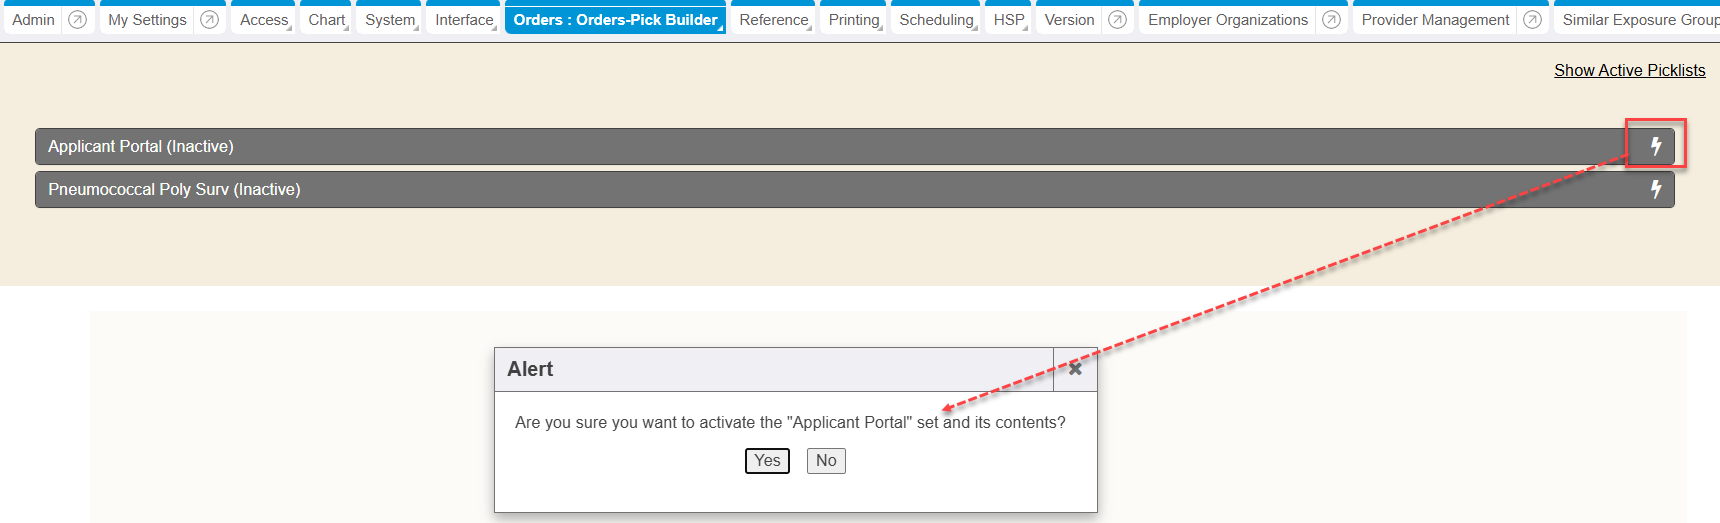
Deactivate and Restore a Group or Order
- Within a picklist, click the Trash Can icon next to the group or order item. It is marked Deactivated rather than removed.
- In the active picklist, click the Eyeball icon to View Inactive Items to show deactivated groups and items.
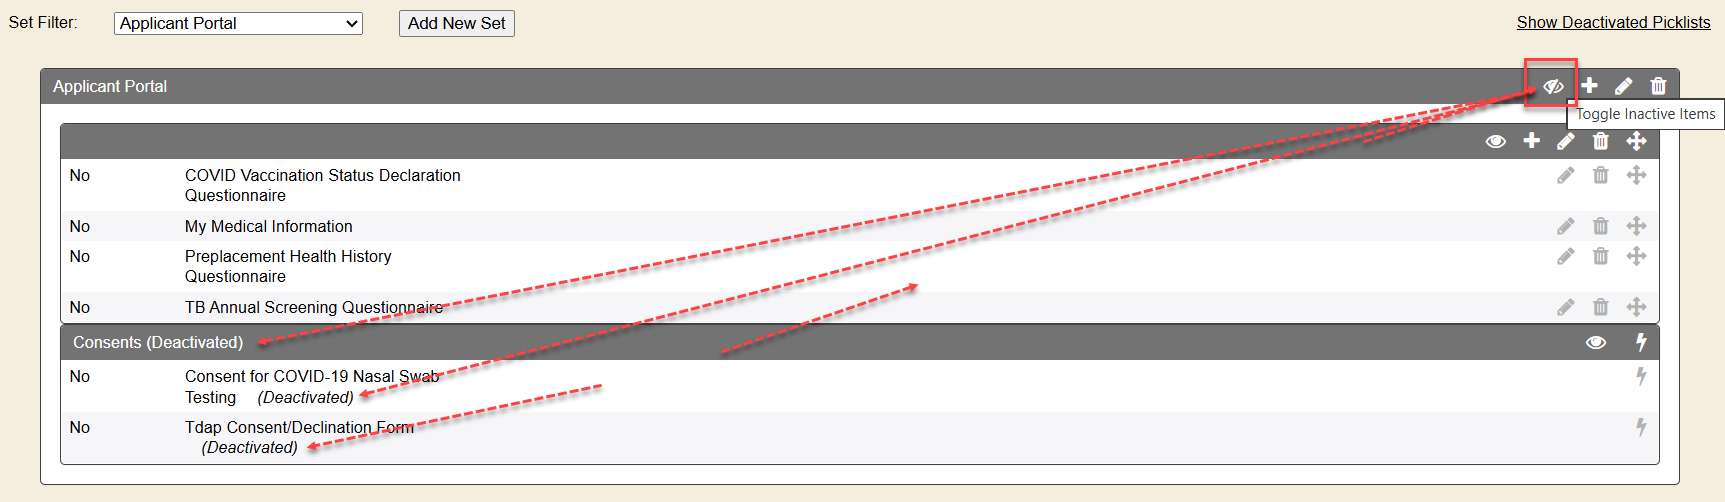
- Click the Lightning Bolt icon to reactivate the group or item.
Restricting picklists by department
You can limit who sees and uses specific order picklists with the system setting E-Chart > Order Picklists > Restrict Sets. Restricting sets is disabled by default.

Restrict Picklist to Certain Departments
- Enable the E-Chart > Order Picklists > Restrict Sets setting. Its value names the order picklists to restrict.
- In Access Control, create a department whose name starts with the exact picklist name. Other words may follow it.
- Tag the users who need the picklist to that department.
Only users in the matching department can see and use the restricted picklist. It is hidden from everyone else.
On the Order Request screen, the selectable order items under the Set Name field are the ones in the picklist (set) you are working in.
Using Picklists in an Encounter
Once a picklist is built, it appears in the encounter in the places below, depending on its purpose.
Protocol Picklists
There are several picklists that can be created in conjunction with the Protocol functionality.
Protocol Orders
Protocol Orders picklists group the orderable items for a specific protocol, and each picklist is named after its protocol. When a matching protocol is selected in Chief Complaint, its orders appear in the Visit Orders section.
How it Works in the Encounter
- Select a protocol in the Chief Complaint section of the encounter.
- Go to the Visit Orders section.
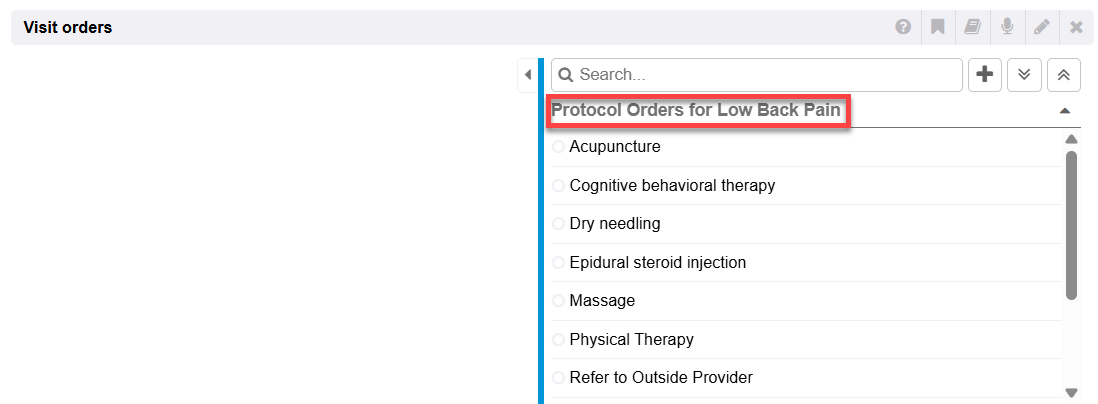
- Any matching Protocol Orders display there, in either the expanded section view or the right side quick list view.
Where it is Configured
The items in each Protocol Orders picklist are set up in the Orders-Pick Builder in the Control Panel.
Protocol Procedures
Protocol Procedures group the orderable items for a specific protocol, and each picklist is named after its protocol. When a matching protocol is selected in Chief Complaint, its orders appear in the Tests & Procedures section.
How it Works in the Encounter
- Select a protocol in the Chief Complaint section of the encounter.
- Go to the Tests & Procedures section.
- Any matching Protocol Procedures display there, in the right side quick list.
Where it is Configured
The items in each Protocol Procedures picklist are set up in the Orders-Pick Builder in the Control Panel. The Protocol Procedures set may need to be created in the Pick Builder.
Protocol Treatments
Protocol Treatments group the orderable items for a specific protocol, and each picklist is named after its protocol. When a matching protocol is selected in Chief Complaint, its orders appear in the Treatment section.
How it Works in the Encounter
- Select a protocol in the Chief Complaint section of the encounter.
- Go to the Treatments section.
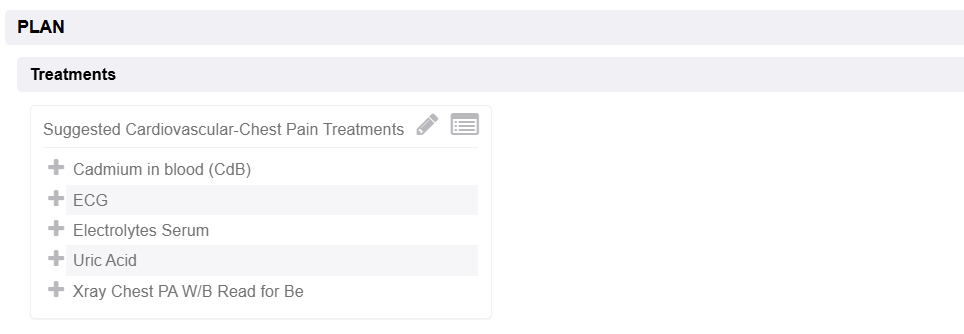
- Any matching Protocol Treatments display there, in a list to be selected to add to the exam.
Where it is Configured
The items in each Protocol Treatments picklist are set up in the Orders-Pick Builder in the Control Panel.
Add Referral (right side quick list)
Add Referral lets you pick a preconfigured Order Picklist category and immediately create an order requisition for the tests or procedures in that category.
Create a Requisition with Add Referral
- In the encounter, open the right side quick list within the Visit Orders section.
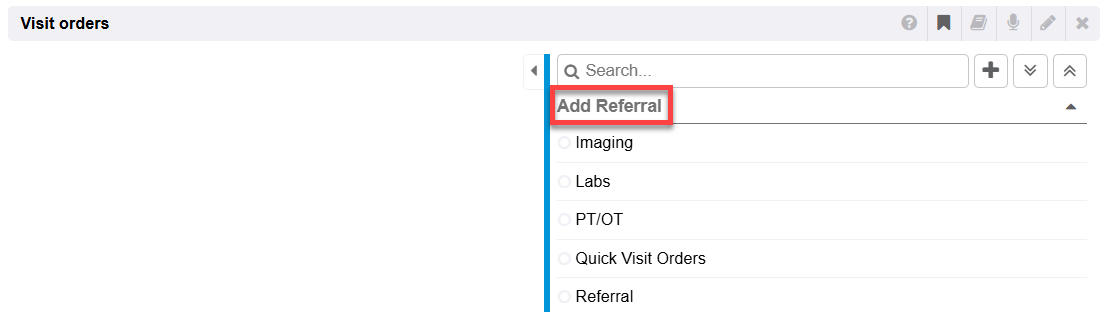
- Select a referral category, for example Imaging.
- In the Create Requisition pop-up, select the items to include in the requisition.
- Fill out the order details.
- Click Save.
Saving creates an order requisition document. You can share it (print, fax and so on) and track it until results are received. Requisitions created this way appear in the separate Open Order Requests encounter section.
Where it is Configured
The categories and their items are built in the Orders-Pick Builder in the Control Panel. Which categories show as Add Referral options is controlled in the Encounter Types editor in the Control Panel. Picklists may show or be hidden depending on the encounter type you are working in.
Quick Visit Orders (right side quick list)
Quick Visit Orders lets you pick from a preconfigured Quick Visit order picklist. After an item is in Visit Orders, use the function icons on its row to take further action. For example, create an order requisition, evaluate a health surveillance panel order item, or add a task.
Create a Quick Visit Order
- In the encounter, open the right side quick list within the Visit Orders section.
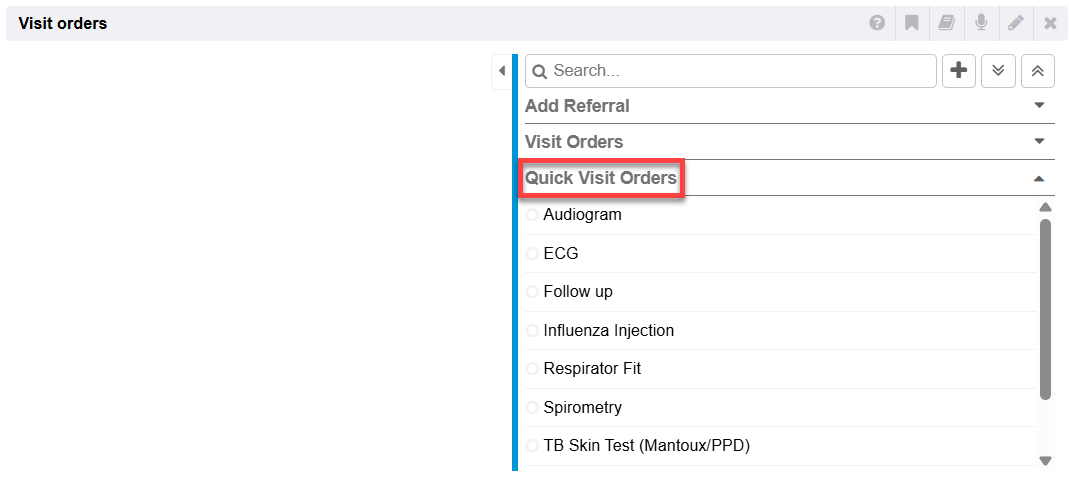
- Select an item from the Quick Visit Orders list by clicking the Lightning Bolt icon (Add to Exam) or the Plus Sign Icon (Add to Due List).
Where it is Configured
The Quick Visit Orders picklist categories and their items are built in the Orders-Pick Builder in the Control Panel.